Conception de PCB
South-Electronic
Découvrez l'excellence en conception de PCB avec South-Electronic, votre partenaire de confiance pour des circuits imprimés de haute qualité, fiables et économiques. Que vous ayez besoin de conceptions monocouches ou multicouches, nos solutions personnalisables répondent à tous vos besoins électroniques, garantissant précision et performance pour une large gamme d'applications.
Transformez vos projets avec un PCB supérieur !
Bienvenue chez South-Electronic, où vous trouverez des conceptions de PCB de base reconnues pour leur précision et leur polyvalence. Nos PCB de base offrent des performances exceptionnelles, idéales pour une large gamme d’applications. Choisissez parmi des options comme les cartes monocouches et multicouches, toutes personnalisées pour répondre à vos besoins électroniques spécifiques.
Faites confiance à South-Electronic pour une qualité et une cohérence inégalées dans vos projets électroniques. Nos PCB de base améliorent les performances de vos appareils grâce à une conception et une qualité exceptionnelles. Choisissez South-Electronic pour votre prochain projet et profitez d’un service inégalé et de conceptions de PCB supérieures. Commencez dès maintenant pour un résultat qui vous distingue !
-
Flexibilité dans les commandes
Commandez exactement ce dont vous avez besoin, quand vous en avez besoin.
Que vous recherchiez un prototype unique ou plusieurs itérations, nous adaptons chaque commande à vos exigences spécifiques, garantissant un processus flexible et fluide pour vous. -
Équipe expérimentée
Profitez de notre expertise industrielle pour votre prochain projet.
Avec plus d'une décennie d'expérience, notre équipe est là pour vous aider à réussir grâce aux connaissances et aux idées que nous avons acquises dans l'industrie. -
Qualité garantie
Profitez de la meilleure qualité directement du fabricant.
En tant que fabricant principal, nous garantissons une qualité supérieure qui dépasse celle des autres fournisseurs, vous offrant la tranquillité d'esprit que vous méritez. -
Livraison rapide
Recevez vos commandes rapidement grâce à nos processus de production efficaces.
Nous comprenons que le temps est précieux. Nos opérations rationalisées garantissent que vous recevez vos produits rapidement, maintenant vos projets sur la bonne voie sans retard. -
Satisfaction garantie
Des solutions PCB tout-en-un conçues pour votre satisfaction.
Grâce à notre large gamme d'équipements de traitement, nous offrons des services complets pour répondre à tous vos besoins en PCB, garantissant une expérience fluide du début à la fin. -
Efficacité stratégique de la chaîne d'approvisionnement
Votre satisfaction est renforcée par notre transparence.
Nos processus de chaîne d'approvisionnement optimisés incluent un suivi en temps réel et un service client dédié, améliorant ainsi la satisfaction globale des clients et la transparence opérationnelle.
Projets connexes que nous avons réalisés
Avis des clients
Questions fréquentes
Questions les plus populaires
Envoyez-nous un message
Plus vous remplissez de détails, plus nous pourrons avancer rapidement à l’étape suivante.











Le guide complet pour la conception de PCB de base
Sommaire
Chapitre 1
Introduction à la conception de PCB de base
Aperçu du PCB (Circuit Imprimé)
Vous êtes-vous déjà demandé ce qui permet à vos appareils électroniques de fonctionner si harmonieusement ? La réponse se trouve souvent au cœur de ces dispositifs : le Circuit Imprimé (PCB). Un PCB est une carte plate qui supporte mécaniquement et connecte électriquement des composants électroniques à l’aide de pistes ou de traces de signal gravées dans des feuilles de cuivre laminées sur un substrat non conducteur. En comprenant les PCB, vous découvrez le secret pour créer des produits électroniques fiables et efficaces.
Importance du PCB dans les appareils électroniques
Pourquoi les PCB sont-ils si cruciaux dans l’électronique ? Imaginez essayer de connecter tous les composants de votre smartphone, ordinateur ou même une simple télécommande sans PCB. Ce serait un enchevêtrement de fils, sujet aux erreurs et aux pannes. Les PCB offrent une manière compacte et organisée de connecter les composants, garantissant que vos appareils fonctionnent sans accroc. Ils améliorent également la fiabilité, en veillant à ce que chaque signal atteigne sa destination sans interférences. Avec un PCB bien conçu, vous pouvez créer des produits non seulement fonctionnels mais aussi durables et efficaces.
PCB de base vs PCB avancé : comprendre les différences
En ce qui concerne les PCB, ils ne sont pas tous égaux. Les PCB de base impliquent généralement des conceptions plus simples avec moins de couches et un routage direct. Ils sont parfaits pour des applications moins complexes, où la fonctionnalité est primordiale mais où les fonctionnalités avancées ne sont pas nécessaires.
En revanche, les PCB avancés vont plus loin. Ils incluent souvent plusieurs couches, des conceptions complexes et un support pour des signaux à haute vitesse et des circuits sophistiqués. Si votre projet implique des systèmes électroniques sophistiqués, comme l’informatique haute performance ou les télécommunications avancées, un PCB avancé est ce qu’il vous faut.
Comprendre ces différences vous aide à prendre des décisions éclairées sur le type de PCB adapté à votre projet. Que vous visiez un gadget simple ou un appareil de pointe, choisir le PCB approprié est crucial pour réussir.
Chapitre 2
Comprendre les matériaux de PCB
Types de matériaux de PCB
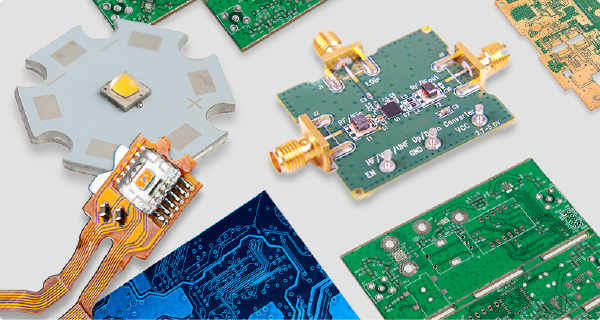
Lorsque vous vous lancez dans la conception de PCB, l’une des premières choses que vous rencontrerez est la variété des matériaux utilisés. Chaque type de matériau de PCB offre des propriétés distinctes qui peuvent avoir un impact significatif sur la performance de votre projet. Les matériaux les plus courants incluent :
- FR-4 : La norme industrielle pour la plupart des PCB, fabriqué à partir de tissu de fibre de verre tissé avec une résine époxy résistante au feu.
- Polyimide : Connu pour sa stabilité thermique exceptionnelle, utilisé dans les applications flexibles et à haute température.
- PTFE (Teflon) : Offre des propriétés électriques supérieures, idéal pour les applications à haute fréquence.
- Noyau métallique : Utilisé pour les applications nécessitant une dissipation thermique excellente, comme l’éclairage LED et les alimentations électriques.
En comprenant ces matériaux, vous pouvez faire des choix éclairés qui répondent aux besoins spécifiques de votre projet.
Caractéristiques du FR-4 et des autres matériaux courants
Vous vous demandez probablement ce qui rend chaque matériau unique. Décomposons les principales caractéristiques de ces matériaux courants :
FR-4 :
- Stabilité thermique : Peut résister à des températures élevées sans se dégrader.
- Résistance mécanique : Fournit un support robuste pour les composants.
- Économique : Largement disponible et abordable, ce qui en fait un choix populaire.
Polyimide :
- Haute résistance à la chaleur : Performant dans des environnements à haute température.
- Flexibilité : Idéal pour les circuits flexibles et les applications dynamiques.
- Durabilité : Résistant aux contraintes chimiques et mécaniques.
PTFE (Teflon) :
- Faible constante diélectrique : Assure une perte de signal minimale, parfait pour les circuits à haute fréquence.
- Résistance à la chaleur : Supporte facilement des températures élevées.
- Résistance chimique : Insensible à la plupart des produits chimiques, ce qui le rend durable et de longue durée.
Noyau métallique :
- Dissipation thermique : Excellent pour les applications où la gestion de la chaleur est essentielle.
- Stabilité : Fournit une base stable pour les composants de haute puissance.
- Durabilité : Résiste aux conditions environnementales difficiles.
En reconnaissant ces caractéristiques, vous serez mieux équipé pour choisir le bon matériau pour votre conception.
Sélection du bon matériau pour votre projet
Choisir le bon matériau pour PCB est crucial pour la réussite de votre projet. Voici comment faire le meilleur choix :
- Évaluer vos besoins : Considérez les besoins électriques, thermiques et mécaniques de votre projet. Concevez-vous un circuit haute fréquence ? Le PCB doit-il résister à des températures élevées ? Comprendre les exigences spécifiques de votre projet est la première étape.
- Faire correspondre les propriétés des matériaux : Une fois vos besoins identifiés, associez-les aux propriétés des matériaux disponibles. Par exemple, si vous avez besoin de stabilité thermique et de résistance mécanique, le FR-4 pourrait être votre meilleur choix. Pour les applications haute fréquence, le PTFE serait plus approprié.
- Considérer le coût : Les contraintes budgétaires sont toujours un facteur. Bien que les matériaux avancés offrent des propriétés supérieures, ils sont également plus coûteux. Équilibrez vos besoins en performance avec votre budget pour trouver le meilleur compromis.
- Prototyper et tester : Parfois, la meilleure façon de déterminer le bon matériau est de prototyper et de tester. Créez un petit lot de PCB en utilisant différents matériaux et testez-les dans des conditions réelles. Cette approche vous permet de voir comment chaque matériau se comporte dans votre application spécifique.
En suivant ces étapes, vous vous assurerez de choisir le bon matériau pour votre PCB, conduisant à une conception réussie et fiable.
Chapitre 3
Logiciels de conception de PCB
Outils populaires de conception de PCB
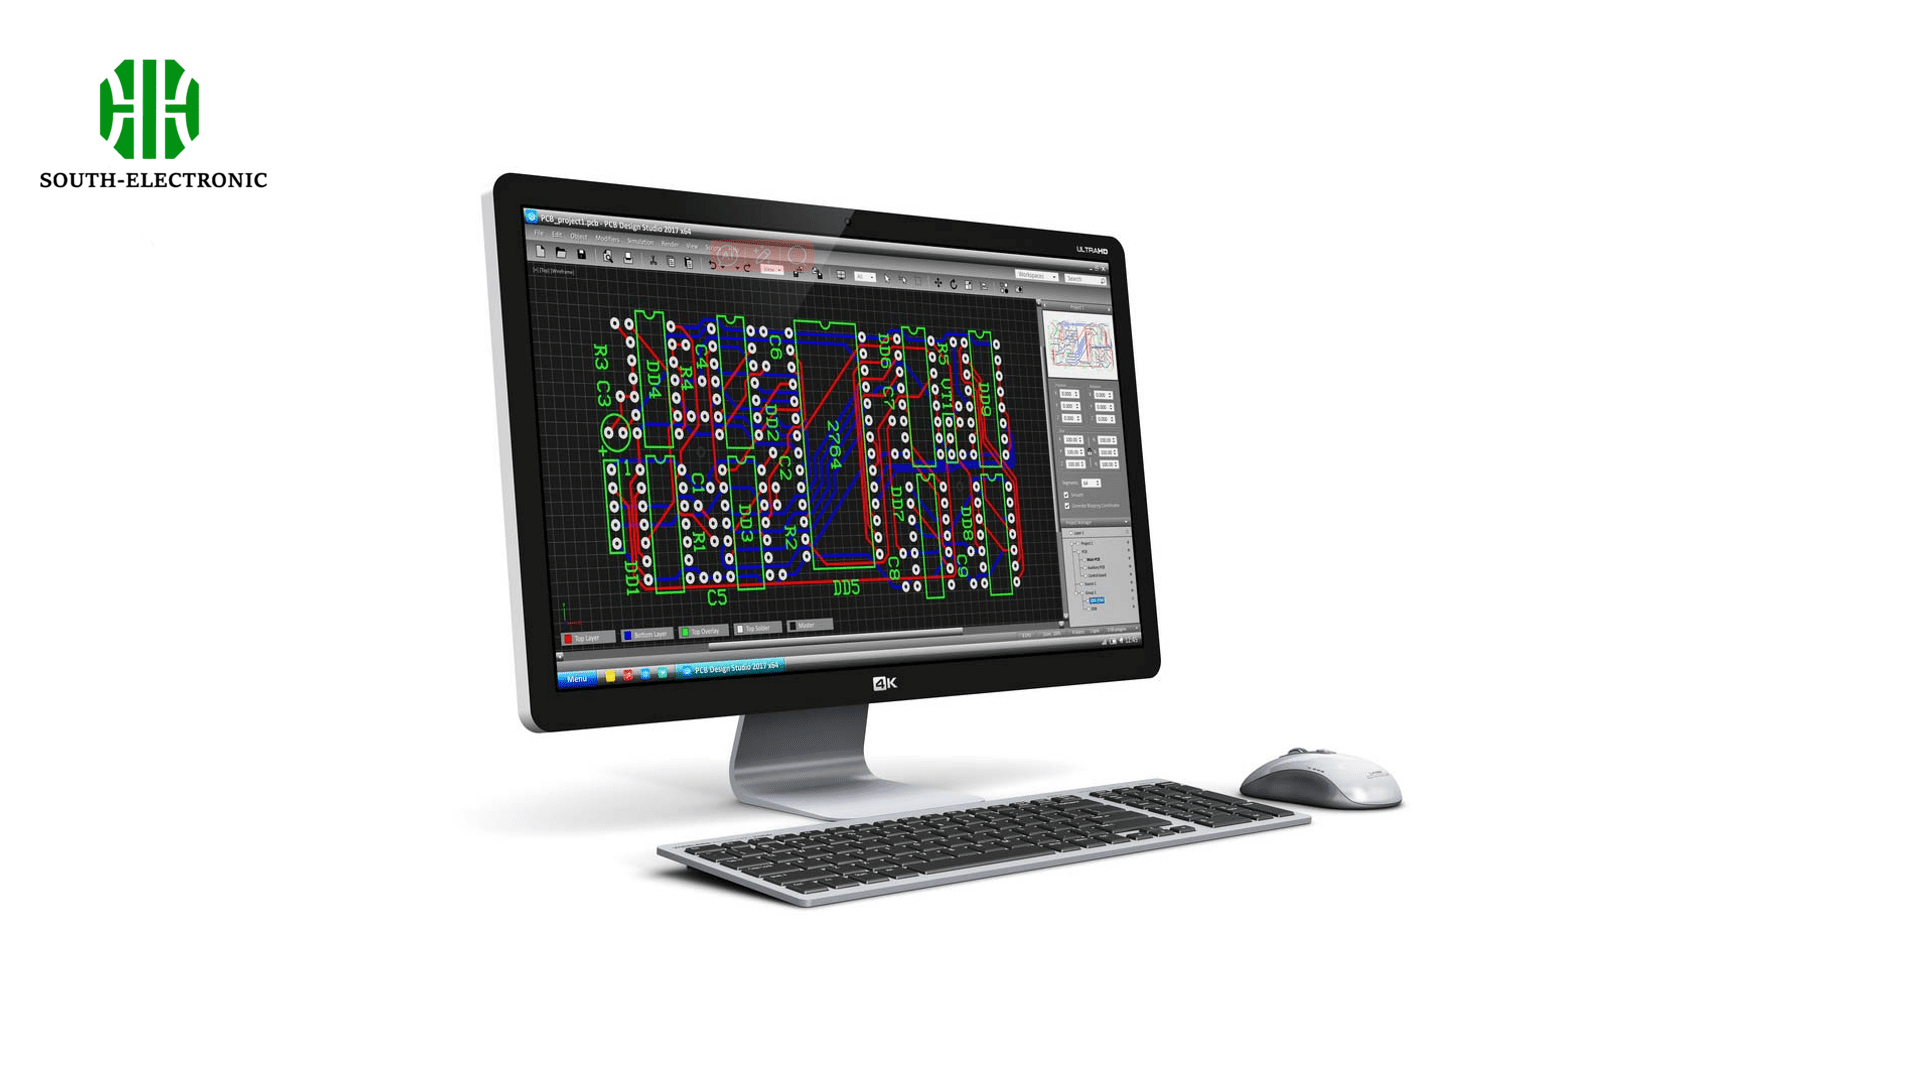
Lorsque vous êtes prêt à concevoir votre PCB, le choix du bon logiciel peut faire toute la différence. Voici quelques-uns des outils de conception de PCB les plus populaires à considérer :
- Altium Designer : Réputé pour ses fonctionnalités robustes et son interface conviviale, il est très prisé par les professionnels.
- Eagle : Un outil puissant et polyvalent adapté aux débutants comme aux utilisateurs avancés.
- KiCad : Une option open source offrant une suite complète d’outils de conception.
- OrCAD : Connu pour ses capacités de simulation avancées et ses bibliothèques de composants étendues.
- EasyEDA : Un outil basé sur le web, facile à utiliser et idéal pour des conceptions rapides et la collaboration.
Ces outils varient en complexité et en fonctionnalités, répondant à différents besoins et niveaux d’expertise.
Caractéristiques et avantages de chaque outil
Examinons les caractéristiques et avantages de chaque logiciel pour vous aider à comprendre ce qui les distingue :
Altium Designer :
- Environnement intégré : Combine la saisie de schémas, la mise en page PCB, et la documentation de conception dans une seule plateforme.
- Routage avancé : Offre des outils de routage puissants, y compris le routage interactif et automatique.
- Visualisation 3D : Permet de visualiser et d’éditer votre conception de PCB en 3D, assurant un placement précis des composants.
- Bibliothèques étendues : Accès à une vaste bibliothèque de composants, économisant du temps lors de la conception.
Eagle :
- Interface conviviale : Intuitive et facile à naviguer, idéale pour les débutants.
- Bibliothèques de composants : Bibliothèques étendues avec une large gamme de composants.
- Capacité de scripting : Supporte les scripts pour automatiser les tâches répétitives, augmentant la productivité.
- Prix abordable : Offre une version gratuite pour les amateurs et des licences à des prix abordables pour les professionnels.
KiCad :
- Open source : Gratuit à utiliser et soutenu par une large communauté de développeurs.
- Outils complets : Inclut la saisie de schémas, la mise en page PCB, un visualiseur 3D, et plus encore.
- Flexible et personnalisable : Permet de créer des composants et empreintes personnalisés.
- Mises à jour régulières : Continuement amélioré avec des mises à jour régulières et de nouvelles fonctionnalités.
OrCAD :
- Simulation avancée : Excellents outils de simulation pour analyser et valider vos conceptions.
- Routage haute performance : Optimisé pour les conceptions complexes avec des exigences de haute vitesse et haute densité.
- Bibliothèques étendues : Grandes bibliothèques de composants préconstruits et modèles.
- Évolutivité : Convient aux petits projets comme aux grandes conceptions complexes.
EasyEDA :
- Basé sur le web : Pas besoin d’installation, accessible depuis n’importe quel appareil connecté à Internet.
- Collaboration : Partage facile et collaboration avec les membres de l’équipe.
- Outils intégrés : Inclut la saisie de schémas, la mise en page PCB, et des outils de simulation.
- Support communautaire : Communauté active et accès à des projets et composants partagés.
Comment choisir le meilleur logiciel pour vos besoins
Le choix du meilleur logiciel de conception de PCB dépend de vos besoins spécifiques et de vos préférences. Voici quelques conseils pour vous aider à faire le bon choix :
Évaluez votre niveau de compétence :
- Débutant : Si vous êtes nouveau dans la conception de PCB, commencez par des outils conviviaux comme Eagle ou EasyEDA. Ils offrent des interfaces intuitives et des tutoriels utiles.
- Intermédiaire/avancé : Pour des conceptions plus complexes, envisagez Altium Designer, OrCAD ou KiCad. Ces outils offrent des fonctionnalités avancées et une plus grande flexibilité.
Évaluez les besoins de votre projet :
- Conceptions simples : Pour des projets simples, un outil basique comme EasyEDA ou Eagle peut suffire.
- Conceptions complexes : Pour des PCB à haute vitesse, haute densité ou multicouches, optez pour Altium Designer, OrCAD ou KiCad, qui offrent des capacités de routage et de simulation puissantes.
Considérez votre budget :
- Gratuit/open source : Si le budget est une contrainte, KiCad est une excellente option open source avec des fonctionnalités robustes.
- Usage professionnel : Pour un usage professionnel et commercial, investir dans un outil complet comme Altium Designer ou OrCAD peut être rentable.
Recherchez le support et la communauté :
- Support communautaire : Des outils comme KiCad et EasyEDA ont des communautés actives qui peuvent être inestimables pour le dépannage et les conseils.
- Support officiel : Des outils professionnels comme Altium Designer et OrCAD offrent un support officiel et une documentation complète.
Testez et expérimentez :
- Versions d’essai : De nombreux fournisseurs de logiciels offrent des essais gratuits. Profitez-en pour tester différents outils et voir lequel convient le mieux à votre flux de travail.
- Expérience pratique : Passez du temps à utiliser le logiciel pour comprendre son interface, ses fonctionnalités, et comment il s’intègre à votre processus de conception.
En considérant attentivement ces facteurs, vous pouvez choisir le logiciel de conception de PCB qui répond le mieux à vos besoins, améliorant ainsi l’efficacité de votre conception et la réussite de votre projet.
Chapitre 4
Concevoir votre premier PCB
Guide étape par étape pour créer une mise en page PCB de base
Prêt à concevoir votre premier PCB ? Suivez ces étapes pour créer une mise en page PCB de base adaptée aux besoins de votre projet.
Définissez vos besoins :
- Liste des composants : Identifiez tous les composants nécessaires pour votre projet.
- Schéma de circuit : Dessinez un schéma pour mapper comment chaque composant est connecté.
Choisissez votre logiciel de conception PCB :
Sélectionnez un outil logiciel convivial tel que Eagle ou KiCad pour commencer votre processus de conception.
Créez le schéma :
- Placer les composants : Utilisez le logiciel pour placer chaque composant sur votre schéma.
- Connecter les composants : Dessinez des lignes pour connecter les composants conformément à votre conception de circuit.
Concevez la mise en page du PCB :
- Placement des composants : Disposez les composants sur la mise en page du PCB, en assurant une disposition optimale pour le flux de signal et l’utilisation de l’espace.
- Routage : Connectez les composants en utilisant des pistes de cuivre, en prêtant attention à la largeur des pistes et aux espacements pour garantir des performances électriques correctes.
- Ajout de vias : Si vous utilisez un PCB multicouche, ajoutez des vias pour connecter les pistes entre les couches.
Générez les fichiers Gerber :
- Vérification du design : Utilisez la vérification des règles de conception (DRC) du logiciel pour identifier et corriger les erreurs.
- Exporter les fichiers : Une fois la conception terminée, exportez les fichiers Gerber, utilisés par les fabricants pour produire votre PCB.
Révision et prototypage :
- Révision : Vérifiez votre conception et les fichiers Gerber pour détecter toute erreur.
- Prototype : Envoyez votre conception à un fabricant de PCB pour créer un prototype.
Considérations clés pour les débutants
Commencer avec la conception de PCB peut être passionnant et un peu difficile. Voici quelques considérations clés à garder à l’esprit :
Placement des composants :
- Placez les composants de manière logique, en gardant les parties connexes proches les unes des autres.
- Assurez-vous que les composants sont orientés correctement pour faciliter le soudage et l’assemblage.
Largeur et espacement des pistes :
- Utilisez des largeurs de pistes appropriées pour le courant qu’elles transporteront.
- Maintenez un espacement correct entre les pistes pour éviter les courts-circuits et les interférences.
Plans d’alimentation et de masse :
- Utilisez des plans dédiés pour l’alimentation et la masse pour réduire le bruit et améliorer l’intégrité du signal.
Gestion thermique :
- Considérez les dispositifs de dissipation thermique pour les composants qui génèrent de la chaleur.
- Utilisez des vias thermiques et des nappes de cuivre pour dissiper la chaleur efficacement.
Règles de conception :
- Suivez les règles de conception spécifiées par votre fabricant de PCB pour garantir que votre conception peut être produite avec précision.
Erreurs courantes à éviter
Éviter les erreurs courantes vous fera gagner du temps et réduira la frustration. Voici quelques erreurs à surveiller :
Mauvais placement des composants :
- Ne placez pas les composants trop près les uns des autres, car cela pourrait rendre le soudage difficile et augmenter le risque de courts-circuits.
Largeurs de pistes incorrectes :
- Évitez d’utiliser des pistes trop étroites pour le courant qu’elles doivent transporter, ce qui peut entraîner une surchauffe et une défaillance.
Ignorer les règles de conception :
- Ne négligez pas les règles de conception fournies par le fabricant. Ne pas respecter ces règles peut entraîner des erreurs de production et des coûts supplémentaires.
Manque de test :
- Ne sautez pas l’étape du prototype. Tester votre conception avec un prototype aide à détecter les erreurs avant la production à grande échelle.
Documentation insuffisante :
- Assurez-vous de documenter votre processus de conception et vos décisions de manière approfondie. Cela vous aidera, vous et les autres, à comprendre la conception plus tard.
Complexité excessive du design :
- Gardez votre conception aussi simple que possible, surtout lorsque vous débutez. La complexité peut entraîner plus d’erreurs et des difficultés lors du dépannage.
En suivant ces étapes, en tenant compte des considérations clés et en évitant les erreurs courantes, vous serez sur la bonne voie pour concevoir votre premier PCB réussi. Continuons à explorer davantage sur la conception de PCB pour améliorer vos compétences et les résultats de vos projets.
Chapitre 5
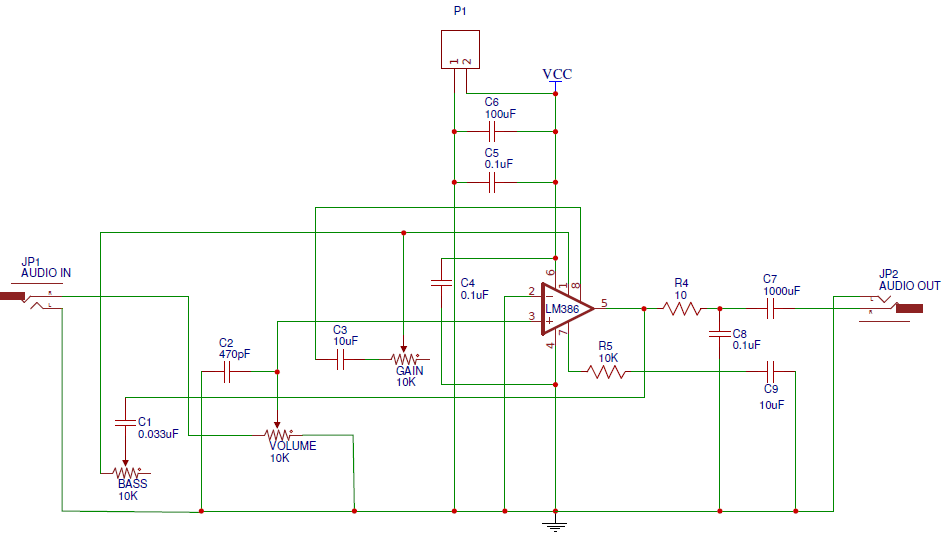
Conception de schéma PCB
Qu’est-ce qu’un schéma PCB ?
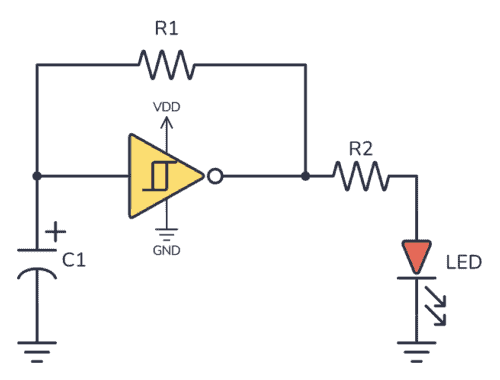
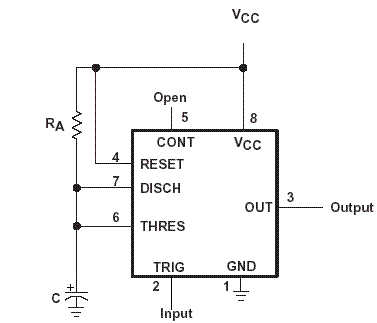
Vous êtes-vous déjà demandé comment les composants électroniques se connectent pour créer un circuit fonctionnel ? C’est là qu’intervient le schéma PCB. Un schéma PCB est une représentation graphique de votre circuit électronique. Il montre comment les composants tels que les résistances, les condensateurs et les circuits intégrés (ICs) sont connectés à l’aide de lignes représentant des connexions électriques. Pensez-y comme le plan de base de votre mise en page PCB, guidant le placement et le routage de vos composants sur la carte réelle.
Créer et lire des schémas PCB
Créer et lire des schémas PCB est une compétence essentielle pour tout projet électronique. Voici comment commencer :
Commencez par un plan clair :
- Identifier les composants : Listez tous les composants nécessaires pour votre circuit.
- Comprendre les connexions : Sachez comment chaque composant doit être connecté aux autres.
Utilisez un logiciel de conception de schémas :
- Choisissez votre outil : Sélectionnez un logiciel convivial comme Eagle, KiCad ou Altium Designer.
- Placer les composants : Glissez-déposez les symboles pour chaque composant dans l’espace de travail de votre schéma.
- Tracer les connexions : Utilisez des lignes pour connecter les composants selon votre plan de circuit. Ces lignes représentent les connexions électriques ou réseaux.
Étiquetez et organisez :
- Étiquettes des composants : Attribuez des désignateurs de référence (par exemple, R1, C1, U1) à chaque composant pour une identification facile.
- Étiquettes des réseaux : Nommez les réseaux importants, comme l’alimentation et la masse, pour plus de clarté.
Révisez et validez :
- Vérifiez les connexions : Assurez-vous que toutes les connexions sont correctes et complètes.
- Effectuez un ERC (Vérification des Règles Électriques) : Utilisez l’outil ERC intégré du logiciel pour identifier tout problème potentiel, comme des broches non connectées ou des courts-circuits.
Lire un schéma PCB implique de comprendre les symboles et les connexions :
- Symboles : Reconnaissez les symboles standardisés pour les différents composants (par exemple, résistances, condensateurs, transistors).
- Connexions : Suivez les lignes (réseaux) pour voir comment les composants se connectent et interagissent.
- Désignateurs de référence : Utilisez les étiquettes pour identifier et localiser des composants spécifiques.
Conseils pour une conception de schéma efficace
Créer un schéma efficace garantit que votre PCB fonctionne correctement et est facile à comprendre. Voici quelques conseils pour vous aider à concevoir de meilleurs schémas :
Gardez-le organisé :
- Disposition logique : Disposez les composants de manière logique, en regroupant les composants connexes.
- Chemins clairs : Évitez les lignes croisées pour garder le schéma propre et facile à suivre.
Étiquetez tout :
- Étiquettes descriptives : Utilisez des étiquettes claires et descriptives pour les composants et les réseaux. Cela facilite le dépannage et la collaboration.
- Noms cohérents : Maintenez une cohérence dans les conventions de nommage pour une identification facile.
Utilisez des symboles standards :
- Symboles standardisés : Respectez les symboles standard de l’industrie pour les composants. Cela garantit que toute personne lisant le schéma peut le comprendre facilement.
Documentez les connexions :
- Notes et annotations : Ajoutez des notes ou annotations pour expliquer les parties complexes du circuit.
- Numéros de broches : Étiquetez clairement les numéros de broches sur les connecteurs et ICs.
Prévoyez des points de test :
- Points de test : Incluez des points de test dans votre conception pour faciliter le dépannage et les tests. Cela vous aide à vérifier rapidement la fonctionnalité de votre circuit.
Vérifiez les connexions deux fois :
- Inspection visuelle : Inspectez soigneusement votre schéma pour vous assurer que toutes les connexions sont correctes.
- ERC (Vérification des Règles Électriques) : Utilisez l’outil ERC dans votre logiciel pour identifier et résoudre les problèmes potentiels.
Simplifiez autant que possible :
- Minimisez la complexité : Gardez votre conception aussi simple que possible tout en répondant à vos besoins. Les conceptions simples sont plus faciles à lire et moins sujettes aux erreurs.
Pensez à l’avenir :
- Modifications futures : Concevez en tenant compte des modifications et extensions futures. Laissez de l’espace pour des composants ou fonctionnalités supplémentaires.
En suivant ces conseils, vous créerez des schémas PCB clairs, précis et efficaces. Cette base vous aidera à concevoir des PCB fiables et fonctionnels, donnant vie à vos projets électroniques. Continuons à explorer davantage sur la conception de PCB pour améliorer vos compétences et les résultats de vos projets.
Chapitre 6
Conception de mise en page PCB
Principes d’une bonne mise en page PCB
Créer une mise en page PCB bien conçue est essentiel pour la fonctionnalité et la fiabilité de votre projet électronique. Voici comment garantir que votre mise en page respecte les meilleurs principes :
Placement clair des composants :
- Groupement logique : Regroupez les composants logiquement selon leur fonction. Cela rend la mise en page plus facile à comprendre et à dépanner.
- Gestion de l’espace : Assurez-vous qu’il y a suffisamment d’espace entre les composants pour dissiper la chaleur et faciliter le soudage.
Routage efficace :
- Chemin le plus court : Gardez les pistes aussi courtes et directes que possible pour minimiser la résistance et la perte de signal.
- Gestion des couches : Utilisez efficacement les différentes couches, en en réservant une pour les plans de masse afin de réduire le bruit.
Intégrité du signal :
- Plans de masse : Utilisez des plans de masse continus pour fournir un chemin à faible impédance et réduire le bruit.
- Adaptation d’impédance : Assurez-vous que les pistes transportant des signaux haute fréquence ont une impédance contrôlée.
Gestion thermique :
- Dissipation thermique : Placez les composants générant de la chaleur loin des composants sensibles et utilisez des vias thermiques pour dissiper la chaleur.
Conception pour la fabricabilité :
- Tailles standard : Respectez les tailles et empreintes des composants standard pour simplifier l’assemblage.
- Espacements : Maintenez des espacements adéquats pour éviter les courts-circuits et garantir une opération fiable.
Techniques pour un placement optimal des composants
Placer correctement les composants sur votre PCB est essentiel pour un design fonctionnel et efficace. Voici comment y parvenir :
Priorisez les composants critiques :
- Alimentation : Placez les composants d’alimentation en premier pour assurer une distribution stable de l’énergie.
- Signaux haute vitesse : Positionnez les composants avec des signaux haute vitesse pour minimiser la longueur des pistes et éviter les problèmes d’intégrité du signal.
Tenez compte de la gestion thermique :
- Zones thermiques : Regroupez les composants générant de la chaleur et prévoyez des solutions de refroidissement adéquates.
- Distance des composants sensibles : Gardez les composants sensibles à la chaleur éloignés des sources de chaleur.
Suivez le flux du signal :
- Flux logique : Disposez les composants dans l’ordre du flux du signal. Cela facilite le routage et le rend plus intuitif.
- Minimisez la diaphonie : Placez les composants pour minimiser les risques de diaphonie entre les signaux.
Accessibilité pour les tests et le dépannage :
- Points de test : Assurez-vous que les points de test et les composants critiques sont accessibles pour les sondes.
- Orientation des composants : Alignez les composants de manière uniforme pour faciliter l’inspection et les tests manuels.
Équilibre entre les couches :
- Distribution des couches : Répartissez les composants uniformément sur les couches pour éviter les contraintes mécaniques et les déformations lors de la fabrication.
Stratégies de routage pour l’intégrité du signal
Le routage correct de votre PCB est essentiel pour maintenir l’intégrité du signal et garantir des performances fiables. Voici quelques stratégies clés :
Utilisez des plans de masse et d’alimentation :
- Plans dédiés : Utilisez des plans de masse et d’alimentation dédiés pour réduire le bruit et fournir des tensions de référence stables.
- Chemins de retour courts : Assurez-vous que les chemins de retour des signaux sont courts et directs en plaçant les plans de masse près des couches de signal.
Contrôlez l’impédance des pistes :
- Adaptation d’impédance : Adaptez l’impédance des pistes de signaux haute vitesse pour prévenir les réflexions de signal et garantir l’intégrité du signal.
- Largeur de piste constante : Maintenez une largeur de piste constante pour les signaux haute fréquence afin de contrôler l’impédance.
Minimisez la diaphonie :
- Espacement des pistes : Maintenez un espacement adéquat entre les pistes de signal parallèles pour réduire la diaphonie.
- Blindage : Utilisez des pistes de masse ou des plans entre les pistes de signaux haute vitesse pour les protéger des interférences.
Évitez les zones de boucles de signal :
- Réduction des boucles : Gardez les boucles de signal aussi petites que possible pour réduire les interférences électromagnétiques (EMI).
- Dégagement approprié : Utilisez des condensateurs de découplage près des broches d’alimentation des circuits intégrés pour filtrer le bruit.
Utilisez des paires différentielles :
- Routage des paires : Routez les paires différentielles (par exemple, pour les lignes de données haute vitesse) ensemble avec un espacement et une longueur cohérents pour garantir l’intégrité du signal.
- Réduction de l’écart : Assurez-vous que les longueurs des paires différentielles sont égales pour éviter l’écart et maintenir l’intégrité du signal.
Routez soigneusement les signaux sensibles :
- Évitez les zones bruyantes : Gardez les pistes de signaux sensibles éloignées des composants et pistes bruyants.
- Filtrage et blindage : Utilisez des filtres et un blindage pour protéger les signaux sensibles du bruit.
En suivant ces principes et techniques, vous concevrez une mise en page PCB efficace, fiable et optimisée pour l’intégrité du signal. Continuons à explorer davantage sur la conception de PCB pour améliorer vos compétences et réussir vos projets électroniques.
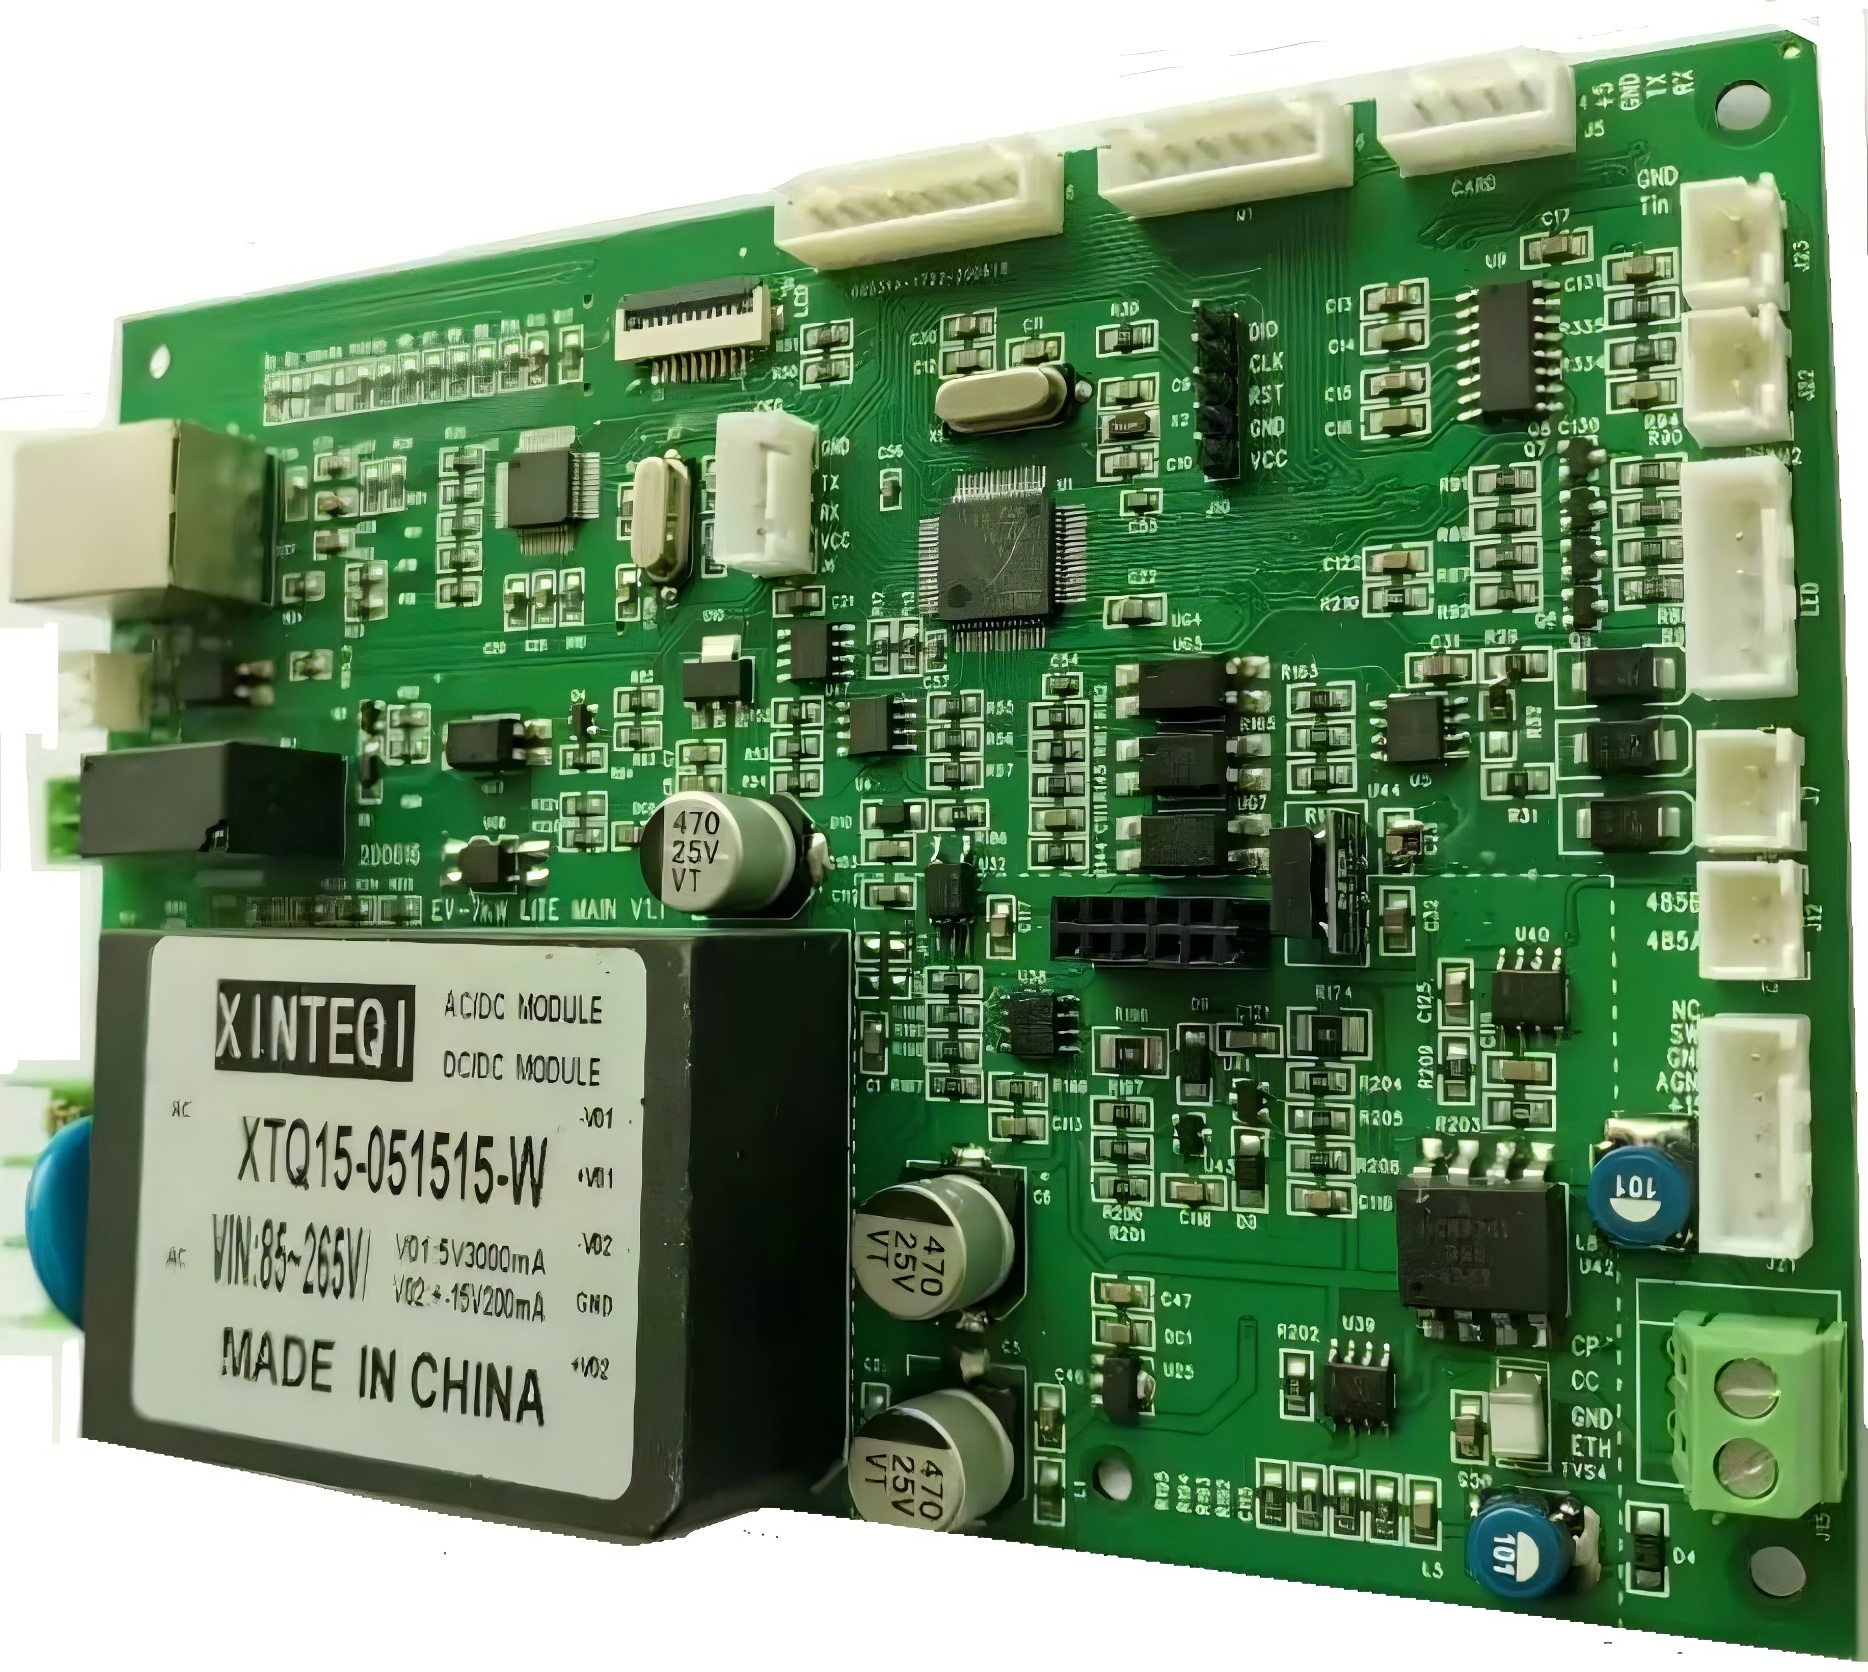
Chapitre 7

Processus de fabrication
Étapes de fabrication des PCB
Prêt à voir votre conception de PCB prendre vie ? Comprendre le processus de fabrication des PCB est essentiel pour garantir le succès de votre projet. Voici un guide étape par étape des étapes de fabrication des PCB :
Préparation du design :
- Générer des fichiers Gerber : Convertissez votre conception de PCB en fichiers Gerber, le format standard utilisé par les fabricants de PCB.
- Vérification du design : Revérifiez votre conception et effectuez une vérification des règles de conception (DRC) pour détecter tout problème potentiel.
Choix des matériaux :
- Choisir le substrat : Sélectionnez le matériau de base approprié (par exemple, FR-4) pour votre PCB.
- Revêtement de cuivre : Appliquez une couche de cuivre sur les deux faces du substrat.
Transfert d’image :
- Application de photo-résist : Appliquez une couche de photo-résist sur la carte revêtue de cuivre.
- Exposition : Utilisez une lumière UV pour transférer votre conception de PCB sur la couche de photo-résist.
- Développement : Développez la carte exposée pour révéler le motif de cuivre.
Gravure :
- Gravure du cuivre : Enlevez le cuivre non protégé à l’aide d’une solution de gravure, ne laissant que les pistes de cuivre souhaitées.
Perçage :
- Perçage des trous : Percez des trous pour les vias, les composants traversants et les points de montage.
Placage :
- Placage de cuivre : Plaquez les trous percés avec du cuivre pour créer des connexions électriques entre les couches.
- Finition de surface : Appliquez une finition de surface (par exemple, HASL, ENIG) pour protéger le cuivre et améliorer la soudabilité.
Masque de soudure et sérigraphie :
- Masque de soudure : Appliquez un masque de soudure pour protéger le PCB et prévenir les ponts de soudure.
- Sérigraphie : Imprimez les étiquettes et les désignateurs de composants sur la carte pour faciliter l’identification et l’assemblage.
Inspection finale :
- Test électrique : Effectuez des tests électriques pour vérifier que toutes les connexions sont correctes.
- Inspection visuelle : Inspectez la carte pour détecter tout défaut ou problème physique.
Découpe et emballage :
- Découpe de la carte : Découpez le PCB en unités individuelles si plusieurs cartes sont fabriquées sur un seul panneau.
- Emballage : Emballez soigneusement les PCB pour éviter tout dommage pendant le transport.
Comprendre le prototypage des PCB
Le prototypage est une étape cruciale dans le processus de conception des PCB. Il vous permet de tester et de valider votre conception avant de passer à la production en série. Voici ce qu’il faut savoir sur le prototypage des PCB :
Pourquoi prototyper ?
- Vérification de la conception : Le prototypage vous aide à vérifier que votre conception fonctionne comme prévu et répond à vos spécifications.
- Identifier les problèmes : Détectez et corrigez tout défaut ou erreur de conception avant la production en série, ce qui permet de gagner du temps et de réduire les coûts.
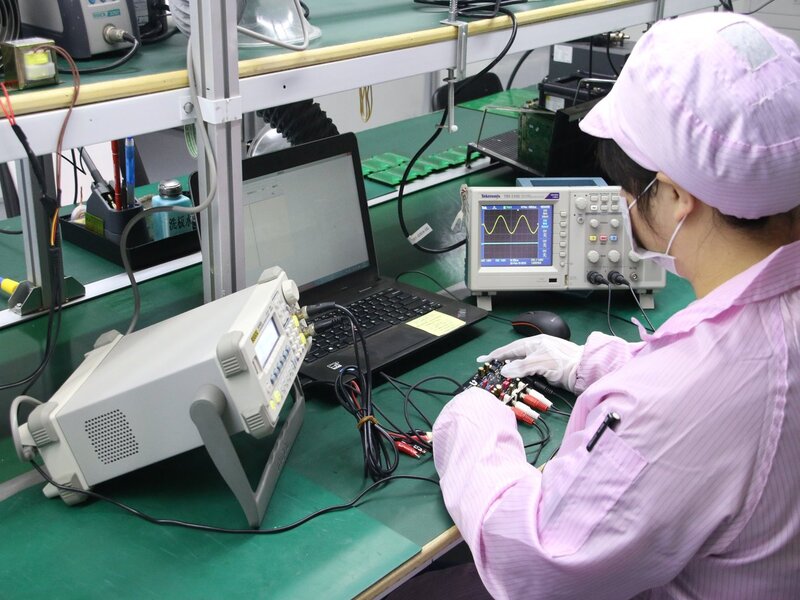
- Test de performance : Testez la performance et la fiabilité de votre PCB dans des conditions réelles.
Types de prototypes :
- Simple face : Pour des conceptions simples avec des composants sur une seule face.
- Double face : Pour des conceptions plus complexes avec des composants sur les deux faces.
- Multicouches : Pour des conceptions à haute densité nécessitant plusieurs couches.
Processus de prototypage :
- Production en petites séries : Les fabricants produisent généralement une petite série de PCB pour le prototypage.
- Test et validation : Effectuez des tests approfondis pour valider la fonctionnalité et les performances du prototype.
- Itération : Apportez les ajustements nécessaires au design en fonction des résultats des tests et produisez d’autres prototypes si nécessaire.
Choix d’un service de prototypage :
- Vitesse : Recherchez un fabricant offrant des délais de livraison rapides pour accélérer le processus de développement.
- Coût : Tenez compte du coût des services de prototypage et équilibrez-le avec votre budget.
- Support : Choisissez un fabricant offrant un bon support client et pouvant vous aider en cas de problème pendant la phase de prototypage.
Comment choisir un fabricant de PCB
Sélectionner le bon fabricant de PCB est crucial pour la réussite de votre projet. Voici comment faire le meilleur choix :
Évaluez l’expérience et l’expertise :
- Expérience dans l’industrie : Recherchez des fabricants ayant une expérience prouvée dans la fabrication de PCB.
- Expertise technique : Assurez-vous que le fabricant dispose des capacités techniques pour répondre à vos exigences spécifiques.
Vérifiez les normes de qualité :
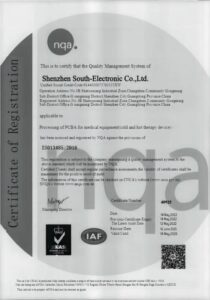
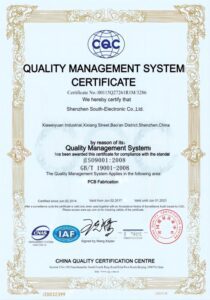
- Certifications : Vérifiez que le fabricant détient les certifications pertinentes (par exemple, ISO9001) indiquant son engagement envers la qualité.
- Contrôle qualité : Renseignez-vous sur leurs processus de contrôle qualité et leurs procédures de test pour garantir des PCB de haute qualité.
Évaluez les capacités de fabrication :
- Capacités : Confirmez que le fabricant peut produire le type de PCB dont vous avez besoin (par exemple, simple face, multicouches, flexible).
- Équipement : Assurez-vous qu’ils utilisent un équipement avancé et bien entretenu pour une fabrication précise et fiable.
Examinez les délais de livraison :
- Délais : Vérifiez les délais du fabricant pour les prototypes et les séries complètes afin de garantir qu’ils peuvent respecter vos échéances.
- Flexibilité : Recherchez la flexibilité dans la prise en charge des commandes urgentes ou imprévues.
Tenez compte du coût :
- Tarification : Comparez les tarifs de plusieurs fabricants pour trouver un prix compétitif sans compromettre la qualité.
- Valeur : Prenez en compte la valeur globale, y compris la qualité, le service et le support, plutôt que de simplement rechercher le prix le plus bas.
Support client :
- Communication : Choisissez un fabricant offrant un support client réactif et utile pour résoudre tout problème ou préoccupation.
- Assistance : Assurez-vous qu’ils offrent une assistance tout au long du processus, de la conception à la livraison.
En suivant ces étapes et considérations, vous pourrez choisir un fabricant de PCB qui répond à vos besoins et garantit le succès de votre projet. Continuons à explorer davantage sur la conception des PCB pour améliorer vos compétences et concrétiser avec succès vos projets électroniques.
Chapitre 8
Assurance qualité et tests
Importance des tests PCB
Assurer la qualité et la fiabilité de vos PCB est essentiel pour le succès de vos projets électroniques. Voici pourquoi les tests PCB sont si importants :
- Fiabilité : Vous souhaitez que vos appareils fonctionnent de manière cohérente sans pannes. Les tests permettent d’identifier et de corriger les problèmes potentiels, garantissant que vos PCB fonctionnent de manière fiable dans le temps.
- Performance : Votre objectif est d’atteindre des performances optimales avec vos composants électroniques. Les tests vérifient que votre PCB répond aux spécifications de conception et fonctionne comme prévu.
- Conformité : Vous devez respecter les normes industrielles et les exigences réglementaires. Les tests garantissent que vos PCB sont conformes aux normes nécessaires, évitant ainsi les problèmes juridiques et opérationnels.
- Économies : Vous cherchez à minimiser les erreurs coûteuses et les reprises. Les tests précoces permettent de détecter les problèmes avant la production en série, ce qui vous fait gagner du temps et de l’argent.
- Satisfaction client : Vous souhaitez livrer des produits de haute qualité qui satisfont vos clients. Des tests approfondis garantissent la qualité de vos PCB, ce qui mène à des clients heureux et fidèles.
Méthodes de test courantes
Pour garantir la qualité de vos PCB, différentes méthodes de test sont utilisées. Voici quelques-unes des plus courantes :
Inspection visuelle :
- Objectif : Identifier les défauts évidents tels que les ponts de soudure, les composants mal alignés et les dommages visibles.
- Méthode : Inspectez visuellement le PCB, souvent à l’aide d’outils de grossissement ou de systèmes d’inspection optique automatisée (AOI).
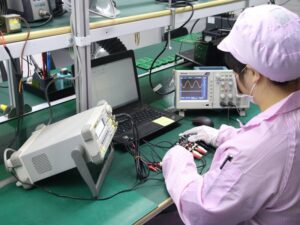
Tests électriques :
- Test en circuit (ICT) :
- Objectif : Vérifier les courts-circuits, les ouvertures, la résistance, la capacité et d’autres paramètres électriques.
- Méthode : Utilisez des sondes de test pour établir un contact électrique avec les points de test du PCB et mesurer divers paramètres.
- Test par sonde volante :
- Objectif : Similaire à l’ICT mais utilisé pour les productions à faible volume où les outillages personnalisés ne sont pas rentables.
- Méthode : Utilisez des sondes mobiles pour tester le PCB sans besoin de gabarits personnalisés.
- Test en circuit (ICT) :
Test fonctionnel :
- Objectif : Vérifier la fonctionnalité globale du PCB dans des conditions réelles.
- Méthode : Simulez l’environnement de fonctionnement réel et testez les performances du PCB dans la configuration finale du produit.
Test de burn-in :
- Objectif : Identifier les pannes précoces et garantir une fiabilité à long terme en soumettant le PCB à des températures et charges élevées.
- Méthode : Faites fonctionner le PCB à des températures et tensions élevées pendant une période prolongée.
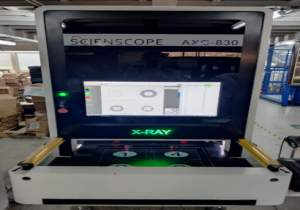
Inspection par rayons X :
- Objectif : Détecter les défauts cachés, tels que les vides dans les joints de soudure ou les couches internes.
- Méthode : Utilisez l’imagerie par rayons X pour examiner la structure interne du PCB sans l’endommager.
Assurer la qualité dans votre conception PCB
Pour garantir que votre conception PCB maintient une qualité élevée, suivez ces meilleures pratiques :
Vérifications des règles de conception (DRC) :
- Objectif : Détecter les erreurs de conception tôt.
- Méthode : Utilisez la fonctionnalité DRC de votre logiciel de conception pour identifier les problèmes tels que les violations d’espacement, les réseaux non connectés et autres infractions aux règles de conception.
Sélection des composants :
- Objectif : Garantir des performances fiables.
- Méthode : Choisissez des composants de haute qualité auprès de fournisseurs réputés et vérifiez leurs spécifications par rapport à vos exigences.
Documentation appropriée :
- Objectif : Éviter les malentendus et les erreurs.
- Méthode : Maintenez une documentation détaillée et claire, y compris des schémas, des mises en page, une nomenclature (BOM) et des instructions d’assemblage.
Prototypage et tests :
- Objectif : Valider votre conception avant la production en série.
- Méthode : Créez et testez des prototypes pour identifier et corriger tout problème. Itérez si nécessaire pour affiner votre conception.
Gestion thermique :
- Objectif : Prévenir la surchauffe et garantir une fiabilité à long terme.
- Méthode : Concevez avec un dégagement thermique adéquat, des dissipateurs thermiques et une ventilation appropriée pour gérer efficacement la chaleur.
Intégrité du signal :
- Objectif : Assurer une transmission fiable des signaux.
- Méthode : Suivez les meilleures pratiques pour le routage des pistes, telles que l’impédance contrôlée, la terminaison appropriée et la réduction de la diaphonie.
Audits et examens réguliers :
- Objectif : Améliorer continuellement la qualité.
- Méthode : Effectuez des examens et audits réguliers de la conception pour garantir la conformité aux normes de qualité et identifier les domaines à améliorer.
Collaboration avec le fabricant :
- Objectif : Garantir la fabricabilité et la qualité.
- Méthode : Travaillez en étroite collaboration avec votre fabricant de PCB pour comprendre ses capacités et intégrer ses retours dans votre conception.
En incorporant ces méthodes de test et pratiques d’assurance qualité, vous garantirez que vos PCB sont de la plus haute qualité, menant à des produits électroniques fiables et réussis. Continuons à explorer davantage sur la conception PCB pour améliorer vos compétences et concrétiser avec succès vos projets.
Chapitre 9

Stratégies de conception PCB économiques
Réduire les coûts de conception PCB
Vous souhaitez créer des PCB de haute qualité sans dépasser votre budget. Voici comment réduire efficacement les coûts de conception PCB :
Simplifiez votre conception :
- Minimisez les couches : Utilisez le nombre minimum de couches nécessaires pour répondre à vos besoins. Moins de couches signifient des coûts de fabrication réduits.
- Composants standards : Restez fidèle aux composants standard largement disponibles pour éviter les prix élevés.
- Disposition compacte : Optimisez la disposition pour tenir dans des tailles de carte plus petites, réduisant ainsi les coûts des matériaux.
Utilisation efficace des matériaux :
- Panneautage : Maximisez l’utilisation des panneaux PCB en arrangeant votre conception pour minimiser le gaspillage. Cela augmente le nombre de PCB obtenus par panneau, réduisant le coût par unité.
- Cartes fines : Choisissez des cartes plus fines si elles répondent à vos besoins, car elles sont souvent moins chères.
Conception pour la fabricabilité (DFM) :
- Directives DFM : Suivez les directives DFM pour éviter les fonctionnalités complexes qui augmentent le temps et les coûts de fabrication.
- Évitez les spécifications rares : Utilisez des spécifications courantes pour la largeur des pistes, l’espacement et les tailles des trous pour simplifier la production et réduire les coûts.
Optimisez le placement des composants :
- Réduisez le temps d’assemblage : Placez les composants de manière à minimiser le temps et la complexité de l’assemblage, réduisant ainsi les coûts de main-d’œuvre.
- Assemblage automatisé : Concevez pour l’assemblage automatisé afin de bénéficier des économies réalisées grâce à un placement rapide et précis par machine.
Collaborez avec les fabricants :
- Implication précoce : Impliquez le fabricant tôt dans le processus de conception pour obtenir des conseils sur les mesures d’économie.
- Réductions des fournisseurs : Profitez des relations avec les fournisseurs pour obtenir des réductions sur les composants.
Équilibre entre qualité et budget
Trouver le juste équilibre entre qualité et budget est essentiel. Voici comment y parvenir :
Priorisez les zones critiques :
- Focus sur les composants clés : Investissez dans des composants de haute qualité pour les zones critiques de votre conception tout en utilisant des options plus économiques ailleurs.
- Contrôle de qualité : Assurez-vous de disposer de mesures strictes de contrôle de qualité pour les parties essentielles du PCB afin de maintenir la fiabilité globale.
Coût vs performance :
- Évaluez les compromis : Comprenez où vous pouvez faire des compromis entre coût et performance sans compromettre les fonctions essentielles.
- Test des prototypes : Effectuez des tests approfondis des prototypes pour identifier les spécifications minimales viables nécessaires pour maintenir la qualité.
Économies à long terme :
- Durabilité : Investissez dans des matériaux durables et des composants fiables qui peuvent coûter plus cher au départ mais économiser de l’argent à long terme en réduisant les pannes et les remplacements.
- Efficacité énergétique : Concevez pour une efficacité énergétique afin de réduire les coûts d’exploitation tout au long du cycle de vie du produit.
Relations avec les fournisseurs :
- Négociez les termes : Établissez des relations solides avec les fournisseurs pour négocier de meilleures conditions et des prix.
- Commandes régulières : Passez des commandes régulières et prévisibles pour bénéficier de remises sur volume et de prix préférentiels.
Conseils pour une production PCB économique
Voici quelques conseils pratiques pour rendre la production de PCB plus économique :
Production par lots :
- Grands lots : Produisez des lots plus importants pour réduire le coût par unité. Cela aide également à négocier de meilleurs prix avec les fabricants.
- Combinez les commandes : Si vous avez plusieurs projets, combinez-les en une seule production pour partager les coûts de configuration.
Conception pour des processus standard :
- Évitez les fonctionnalités personnalisées : Restez fidèle aux processus de fabrication standard et évitez les fonctionnalités personnalisées qui peuvent augmenter les coûts.
- Tailles standard : Utilisez des tailles et formes de cartes standard pour minimiser les besoins en outils spéciaux et les coûts de configuration.
Simplifiez l’assemblage :
- Technologie de montage en surface (SMT) : Utilisez des composants SMT lorsque cela est possible pour accélérer l’assemblage et réduire les coûts de main-d’œuvre.
- Conception de panneaux : Concevez des PCB en panneaux pour l’assemblage et les tests automatisés, ce qui réduit le temps de production et les coûts.
Choix des matériaux :
- Matériaux économiques : Choisissez des matériaux économiques qui répondent à vos exigences de performance sans dépenses inutiles.
- Fournisseurs alternatifs : Sourcez les matériaux auprès de plusieurs fournisseurs pour trouver les meilleurs prix et disponibilités.
Tests et assurance qualité :
- Tests automatisés : Mettez en œuvre des tests automatisés pour identifier et corriger rapidement les défauts, réduisant ainsi le coût des reprises.
- Normes cohérentes : Maintenez des normes de qualité cohérentes pour éviter les erreurs coûteuses et assurer des cycles de production fiables.
En appliquant ces stratégies de conception PCB économiques, vous pourrez réduire les dépenses tout en maintenant une qualité élevée, ce qui mènera finalement à des produits électroniques réussis et économiques. Continuons à explorer davantage sur la conception PCB pour améliorer vos compétences et concrétiser efficacement vos projets.
Chapitre 10
Conseils avancés et meilleures pratiques
Rester à jour avec les tendances de conception PCB
Dans le monde rapide de l’électronique, rester à jour avec les dernières tendances en conception PCB est essentiel. Voici comment vous tenir informé :
Suivez l’actualité de l’industrie :
- Blogs et sites technologiques : Lisez régulièrement des blogs technologiques et des sites de l’industrie comme PCB Design World, Electronics Weekly et EDN Network pour rester informé des nouvelles technologies et tendances.
- Newsletters : Abonnez-vous aux newsletters des principaux fabricants de PCB et des éditeurs de logiciels de conception pour recevoir directement des mises à jour dans votre boîte mail.
Rejoignez des communautés en ligne :
- Forums et groupes : Participez à des forums comme PCB Design Forum et des groupes LinkedIn liés à la conception PCB. Engagez-vous dans des discussions et apprenez des expériences d’autres professionnels.
- Réseaux sociaux : Suivez des experts de l’industrie et des entreprises sur des plateformes comme Twitter, LinkedIn et Facebook pour des mises à jour en temps réel.
Assistez à des webinaires et conférences :
- Événements de l’industrie : Participez à des webinaires, conférences virtuelles et salons professionnels pour en apprendre davantage sur les dernières avancées et réseauter avec d’autres professionnels.
- Ateliers : Participez à des ateliers et sessions de formation pour acquérir une expérience pratique avec de nouveaux outils et techniques.
Plateformes éducatives :
- Cours en ligne : Inscrivez-vous à des cours et certifications en ligne sur des plateformes comme Coursera, Udemy et LinkedIn Learning pour améliorer vos compétences et connaissances.
- Webinaires éducatifs : Participez à des webinaires organisés par des leaders de l’industrie et des institutions éducatives pour découvrir les tendances émergentes et meilleures pratiques.
Ressources pour un apprentissage continu
L’apprentissage continu est essentiel pour rester en tête dans la conception PCB. Voici quelques ressources précieuses pour soutenir votre croissance :
Livres et publications :
- Livres essentiels : Lisez des livres fondamentaux comme The Circuit Designer’s Companion de Peter Wilson et PCB Design for Real-World EMI Control de Bruce R. Archambeault.
- Magazines : Abonnez-vous à des magazines de l’industrie comme PCB007 Magazine et Circuit Cellar pour des aperçus et articles réguliers.
Cours en ligne :
- Formation avancée : Suivez des cours avancés en conception PCB, intégrité des signaux et EMI/EMC sur des plateformes comme IPC EDGE, Altium Academy et Cadence Training.
- Sujets spécialisés : Recherchez des cours couvrant des sujets spécialisés tels que la conception PCB haute vitesse, la conception RF PCB et la gestion thermique PCB.
Blogs techniques et sites web :
- Blogs d’experts : Suivez les blogs techniques d’experts de l’industrie comme Eric Bogatin, Rick Hartley et Dr. Howard Johnson pour des aperçus approfondis et des conseils avancés.
- Ressources des fabricants : Utilisez les ressources fournies par les fabricants de PCB et les éditeurs de logiciels de conception, y compris des livres blancs, études de cas et notes d’application.
Forums communautaires :
- Plateformes de discussion : Engagez-vous avec des communautés en ligne telles que Stack Exchange (Electronics), Reddit (PCB Design) et EEVblog Forum pour poser des questions, partager des connaissances et apprendre des pairs.
- Groupes d’utilisateurs : Rejoignez des groupes d’utilisateurs pour des logiciels de conception PCB spécifiques comme AltiumLive et KiCad.info pour accéder à du contenu et un support exclusifs.
Conseils d’experts pour des projets PCB réussis
Voici quelques conseils d’experts pour vous aider à réussir vos projets de conception PCB :
Planification précoce :
- Définir les objectifs : Définissez clairement vos objectifs de projet, spécifications et contraintes avant de commencer le processus de conception.
- Budget et calendrier : Établissez un budget et un calendrier réalistes pour garantir que votre projet reste sur la bonne voie.
Conception pour la fabricabilité (DFM) :
- Simplifiez la conception : Gardez votre conception aussi simple que possible pour réduire la complexité et les coûts de fabrication.
- Pratiques standards : Suivez les règles de conception standard de l’industrie pour garantir la compatibilité avec les processus de fabrication.
Collaboration et communication :
- Collaboration d’équipe : Travaillez en étroite collaboration avec votre équipe, y compris les ingénieurs, fabricants et parties prenantes pour garantir l’alignement de tous.
- Documentation claire : Maintenez une documentation claire et détaillée pour tous les aspects de votre conception, y compris les schémas, dispositions et BOM.
Prototypage et tests :
- Prototypage itératif : Créez des prototypes et itérez en fonction des résultats des tests pour affiner votre conception et détecter les problèmes tôt.
- Tests complets : Effectuez des tests approfondis, y compris fonctionnels, thermiques et EMI/EMC, pour garantir la fiabilité et les performances.
Intégrité des signaux et EMI/EMC :
- Meilleures pratiques : Suivez les meilleures pratiques pour l’intégrité des signaux et EMI/EMC comme l’impédance contrôlée, une mise à la terre correcte et des techniques de blindage.
- Outils de simulation : Utilisez des outils de simulation pour prédire et atténuer les problèmes potentiels d’intégrité des signaux et EMI avant les tests physiques.
Gestion thermique :
- Dissipation thermique : Intégrez des stratégies efficaces de gestion thermique comme les vias thermiques, dissipateurs de chaleur et nappes de cuivre pour éviter la surchauffe.
- Placement des composants : Positionnez les composants générant de la chaleur de manière stratégique pour optimiser le flux d’air et la dissipation thermique.
Amélioration continue :
- Apprendre de l’expérience : Analysez les projets terminés pour identifier les domaines à améliorer et appliquez ces leçons aux conceptions futures.
- Restez curieux : Continuez d’explorer de nouvelles technologies, outils et techniques pour améliorer continuellement vos compétences et capacités.
En restant à jour avec les tendances, en utilisant des ressources d’apprentissage continu et en appliquant des conseils d’experts, vous serez bien équipé pour créer des conceptions PCB réussies et innovantes. Continuons à explorer davantage sur la conception PCB pour améliorer vos compétences et concrétiser vos projets avec excellence.

Contactez-Nous
Où Sommes-Nous ?
Parc Industriel, No. 438 Route Donghuan, No. 438, Shajing Donghuan Road, District Bao'an, Shenzhen, Guangdong, Chine
4ème étage, Bâtiment Zhihui Créatif, No. 2005 Route Xihuan, Shajing, District Baoan, Shenzhen, Chine
CHAMBRE A1-13, ÉTAGE 3, CENTRE INDUSTRIEL YEE LIM, 2-28 RUE KWAI LOK, KWAI CHUNG HK
service@southelectronicpcb.com
Téléphone : +86 400 878 3488
Envoyez-nous un message
Plus vous remplissez de détails, plus nous pourrons avancer rapidement à l’étape suivante.


