

Building an electronics project? Stuck connecting wires? I faced countless dead ends until I understood Molex connectors. These components saved my DIY computer project. Let’s uncover their secrets.
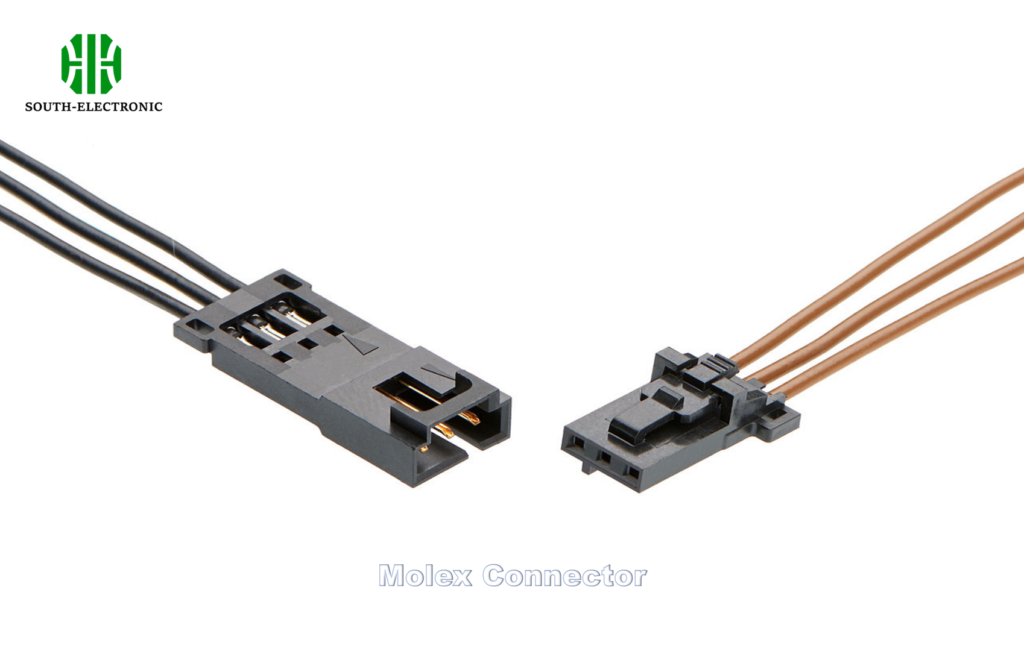
A Molex connector is an electrical plug joining wires to boards or devices. It handles both power flow and data signals. Originally from the Molex company, many manufacturers now produce these versatile plastic-and-metal connectors for electronics.
You’ve learned the basics. But practical skills make them useful. I’ll guide you through identification, crimping, and troubleshooting steps.
How to identify a Molex connector model (pin counts, keys, and coding)?
Grabbed a jumbled box of connectors? I wasted hours matching wrong parts. Quick identification avoids frustration. Three features reveal the model type.
Pin quantity is your first clue. Count each metal pin inside the housing. Keys are asymmetrical tabs preventing wrong insertion. Coding means special pin shapes or added locking clips.
Breaking Down Identification Process
Molex connectors vary widely. I organize them by these characteristics:
Pin Count Method
Numbers matter. Power connectors usually have 2-6 pins. Data versions often exceed 12 pins. For example, PC fan connectors typically show 3-4 pins. Write the count immediately.
Key Recognition
Find the alignment feature. Look for raised plastic ridges or notches. My mistake? Inserting one backwards damaged pins. Keys always have matching grooves on both sides.
Coding Systems
Spot unique identifiers:
- Offset locking arms (latch types)
- Different colored housings
- Square pins among circular ones
| Feature | Purpose | Example |
|---|---|---|
| Pin Count | Determines function | 4-pin = PSU to drive |
| Key Design | Prevents reverse connection | Slotted ridge on one side |
| Coding | Avoids mismatched pairs | Blue housing for data port |
I test every connection before final assembly. Match pin counts first, then confirm key orientation. Coding is your safeguard against voltage mix-ups.
How to crimp a Molex connector, including tools, terminals?
My first crimping attempt caused intermittent failures. Proper technique ensures lasting connections. Three elements guarantee success: tools, terminals, and techniques.
Use ratcheting crimpers. They compress terminals uniformly. Terminals must match connector pin sizes. Never reuse old terminals—I learned this after system crashes.
Essential Crimping Steps
Crimping requires precision. Here’s how I do it:
Tool Selection
Automatic crimpers are best. Their jaws fit terminal sizes exactly. I avoid pliers—uneven pressure causes weak joints. Handheld ratcheting tools are great for DIY.
Terminal Preparation
Pick terminals designed for wire gauge. Stranded wire needs closed barrels. Red terminals suit 18-22AWG wires used in most Molex setups.
Crimping Process
Cut wire cleanly with strippers. Expose 2mm conductor. Insert wire until insulation touches terminal. Squeeze crimper: one click signals completion. Pull test each connection.
| Material | Function | Critical Tip |
|---|---|---|
| Ratcheting Tool | Applies even pressure | Replace dies when corroded |
| Terminal | Metal link between wire/pin | Match color to wire gauge |
| Wire Stripper | Removes insulation | Never nick copper strands |
I test each crimped wire before connecting. Tug firmly—proper crimps withstand pressure. Terminal insulation sections must fully cover exposed wire.
Why does a Molex connector overheat?
Touching a hot connector is dangerous. Overheating causes fires. Understanding root problems fixes them. I’ve witnessed smoke from overlooked issues.
Four main problems create heat: loose terminals increase resistance. Undersized wires struggle with current flow. Damaged connectors cause partial contact. Moisture traps dirt creating arcing.
Overheating Analysis
Heat equals poor connection. Address these aspects:
Loose Connections
Terminals gradually loosen from vibration. My guitar amp fried because of this. Test by wiggling wires while powered off. Replace any wobbling terminals immediately.
Overloaded Circuits
Current flow matters. Calculate expected load before choosing wire gauge. Molex power connectors fail when pushed beyond 8-15A. Use thermal cameras to spot hotspots.
Environmental Factors
Dust acts as insulation. Humid environments accelerate corrosion. I encase outdoor connectors with silicone grease.
| Cause | Result | Solution |
|---|---|---|
| Loose terminal | Sparks generating heat | Re-crimp damaged terminals |
| Excessive current | Melting plastic housing | Add thicker gauge wires |
| Contamination | Corroded pin surfaces | Clean with contact spray |
| Voltage drops | Resistance building heat | Test voltage under load |
Spotting discolored plastic around pins signals heat damage. Replace these connectors immediately.
Conclusion
Molex connectors simplify electronics when used properly. Identify models with pins and keys. Use correct crimping tools. Prevent overheating with robust connections. Build safely.

