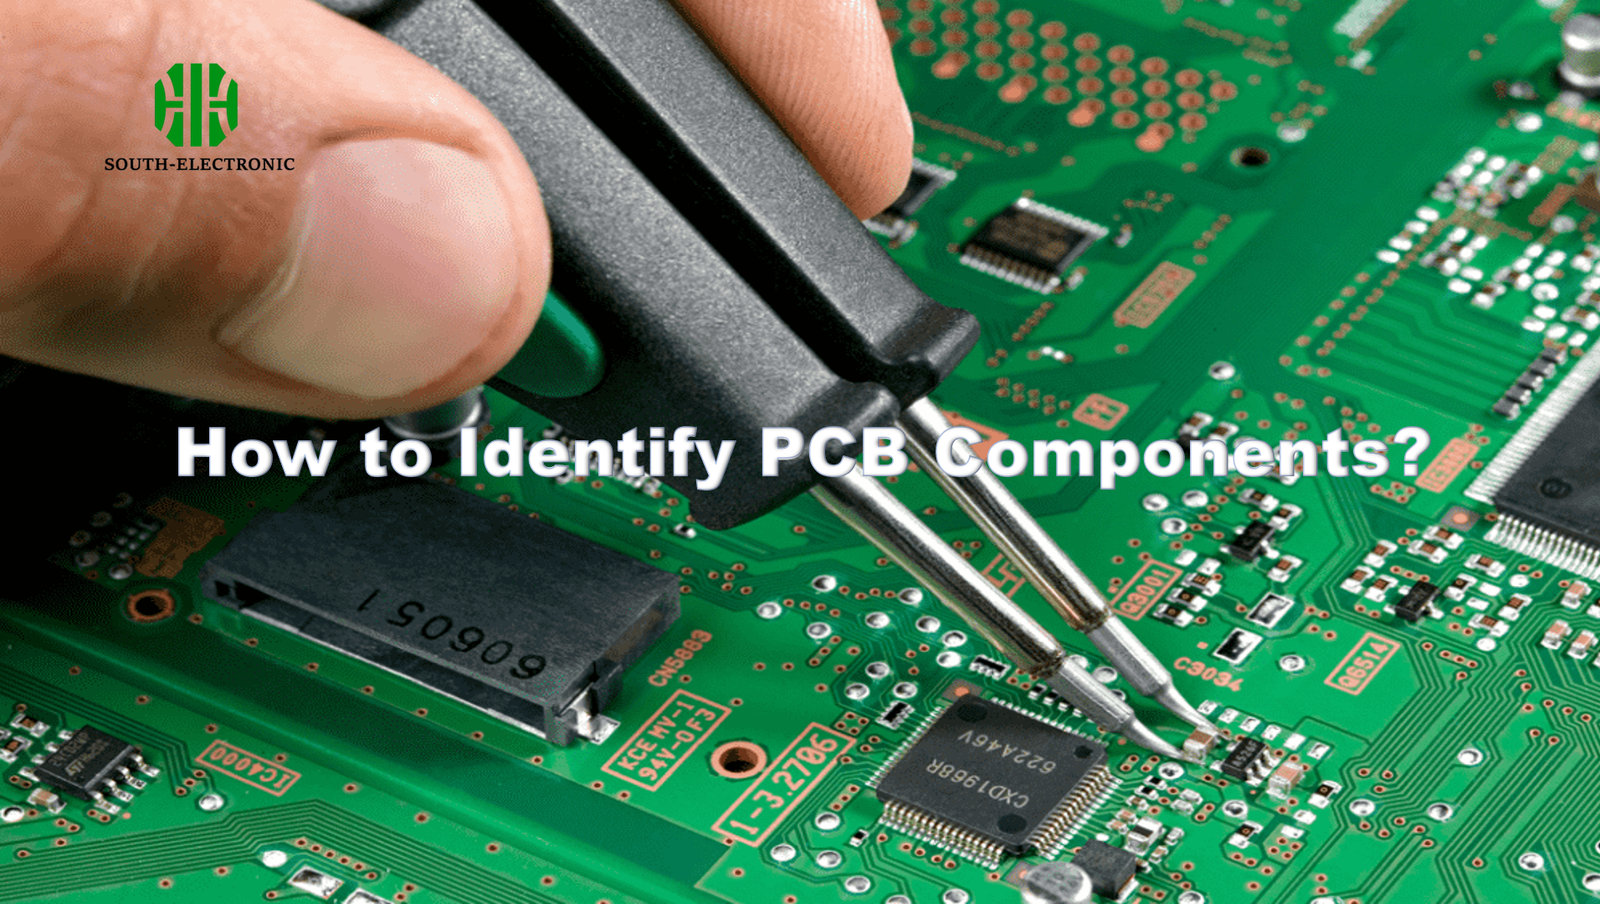
Are you staring at a mysterious PCB board full of tiny parts? Unknown components can turn troubleshooting into a nightmare. Let’s eliminate the confusion and master component identification in simple steps.
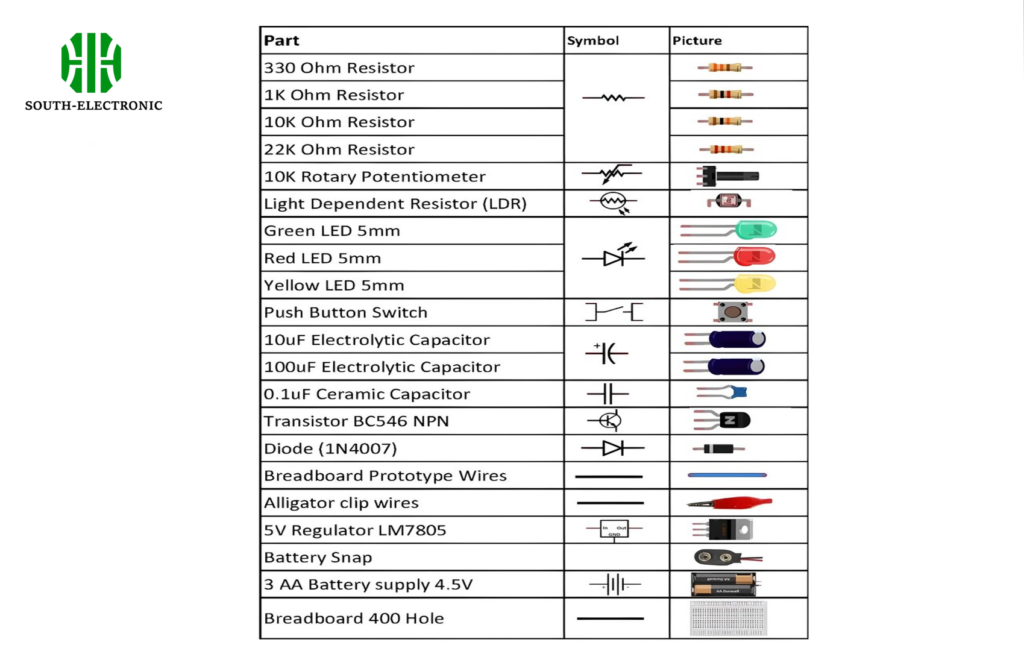
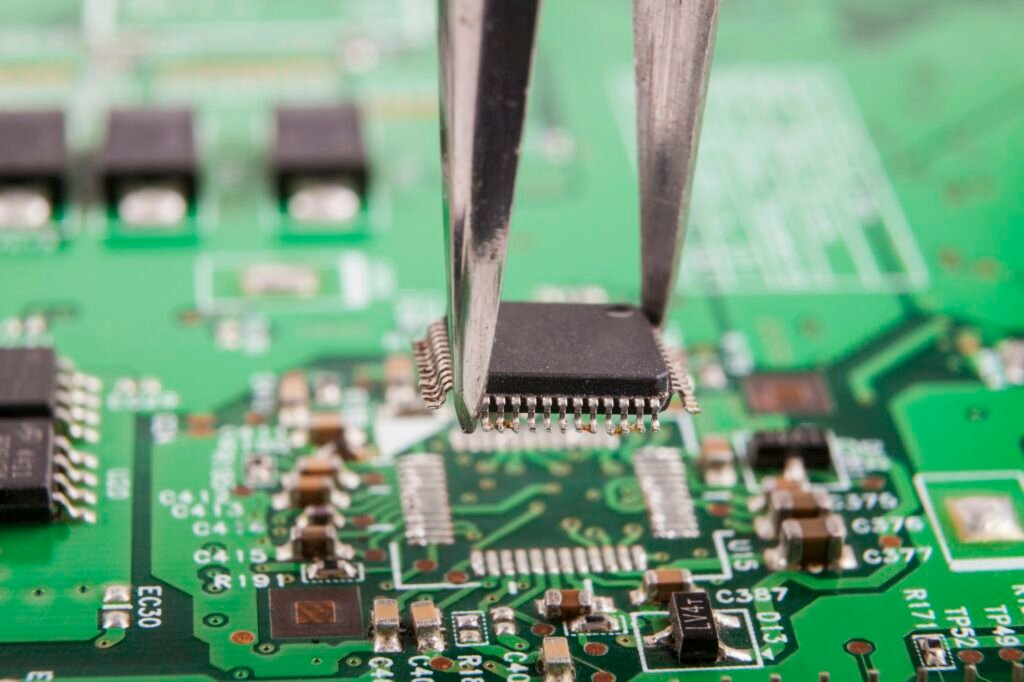
Identify PCB components by checking printed labels (R=resistor, C=capacitor, U=IC) and physical markings. Use magnifiers for small codes and reference schematics when available. Start with large components showing clear values, then work toward smaller surface-mount parts.
Now that we’ve cracked the basic identification process, let’s explore three essential follow-up skills every electronics enthusiast needs. These techniques will transform you from a confused beginner to a confident component detective.
Where to Buy PCB Components?
Struggling to find authentic components? Fake or mismatched parts can ruin your projects. Discover reliable sources that balance quality with affordable pricing.
Purchase PCB components from authorized distributors like Digi-Key or Mouser for guaranteed quality. For hobbyists, AliExpress and Amazon offer budget options. Local electronics shops provide immediate availability for urgent needs.
Smart Component Sourcing Strategies
I learned this lesson when repairing a vintage amplifier – generic capacitors from a random seller failed within weeks. Here’s how to source components effectively:
-
Certified Suppliers
- Best for: Sensitive/professional projects
- Example suppliers: LCSC, element14
- Average delivery: 3-7 days
-
Hobbyist Platforms
- Best for: Prototyping/learning
- Example: eBay stores with 95%+ ratings
- Typical cost: 30-50% cheaper
| Supplier Type | Pros | Cons |
|---|---|---|
| Authorized Distros | Genuine parts | Higher prices |
| Local Shops | Instant availability | Limited selection |
| Online Markets | Low cost | Quality verification needed |
Always cross-check datasheets and verify seller reputation through customer reviews. For rare components, consider salvage from old circuit boards – your local repair shop might give away defective PCBs for free.
How to Check PCB Components?
Dead components can secretly sabotage your projects. Learn diagnostic techniques that prevent hours of frustrating debugging.
Test components using a multimeter’s continuity and resistance modes. Compare measurements against known good values. For ICs, verify power pins and check for overheating during operation.

Comprehensive Component Verification
During my early repair attempts, I once replaced a perfect transistor while the real culprit was a cracked resistor. Here’s a systematic verification process:
-
Visual Inspection
- Burn marks
- Swollen capacitors
- Cracked IC packages
-
Basic Tests
- Resistors: Measure Ω value
- Capacitors: Check ESR (Equivalent Series Resistance)
- Diodes: Forward/reverse bias test
| Component | Test Method | Pass Criteria |
|---|---|---|
| Resistor | Ohm measurement | ±5% of marked value |
| Capacitor | ESR meter | Below datasheet limit |
| Diode | Diode test mode | 0.5-0.7V forward drop |
For integrated circuits, power the board and check:
- Voltage at input/output pins
- Abnormal heat generation
- Signal patterns with oscilloscope
Label verified components with colored markers to avoid retesting. Keep a known-good reference board for comparison.
How to Desolder Components from PCB?
Destroying components during removal wastes money and time. Master safe desoldering techniques that preserve both the PCB and components.
Use a desoldering pump or braid with a temperature-controlled iron (320-380°C). Apply flux to stubborn joints. For multi-pin parts, use hot air stations with nozzle shields.
Professional Desoldering Methods
I ruined my first CPU socket by pulling chips with pliers. Now I use these proven techniques:
Standard Components:
- Heat one pin while lifting with tweezers
- Alternate between pins until free
Surface Mount Devices:
- Shield nearby components with aluminum tape
- Apply hot air at 350°C in circular motion
| Tool | Best For | Tips |
|---|---|---|
| Desoldering Pump | Through-hole parts | Clean nozzle regularly |
| Braid | Fine-pitch components | Use fresh sections |
| Hot Air Station | SMD components | Use correct nozzle size |
Preheat boards with hair dryer (medium heat) for stubborn components. After removal, clean pads with isopropyl alcohol and copper braid. Never force components – if stuck, apply more flux and heat.
Conclusion
Master PCB component identification through labels and testing, source from trusted suppliers, verify functionality methodically, and remove components safely using proper tools. These skills form the foundation of effective electronics repair and prototyping.