
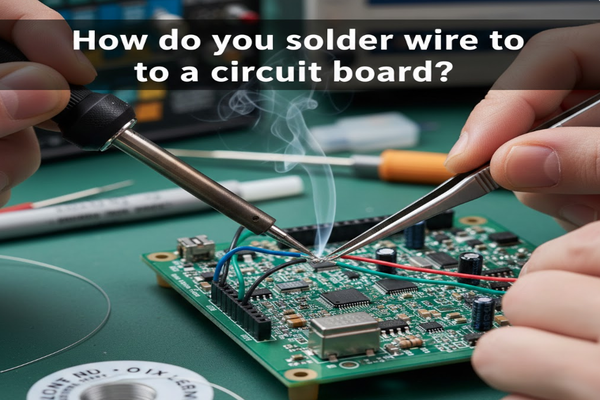
Soldering wires to a circuit board might seem tricky, but with the right steps, it can be straightforward.
To solder wire to a circuit board, ensure you have the right tools, a clean workspace, and a solid understanding of either through-hole[^1] or surface mount[^2] techniques. These methods offer different strengths and flexibility for your projects.
If you’re looking to create reliable electronic connections, learning how to solder is essential. Many underestimate the importance of preparation and technique, leading to messy and unreliable joints.
What tools and materials do you need for soldering wires to a PCB?
Choosing the right tools for soldering is crucial for success. The right tools make the process easier and lead to better results.
You will need soldering iron, solder, wire strippers[^3], and a helping hand tool to hold the PCB in place. A soldering iron[^4] with adjustable temperature is especially important for precision work.
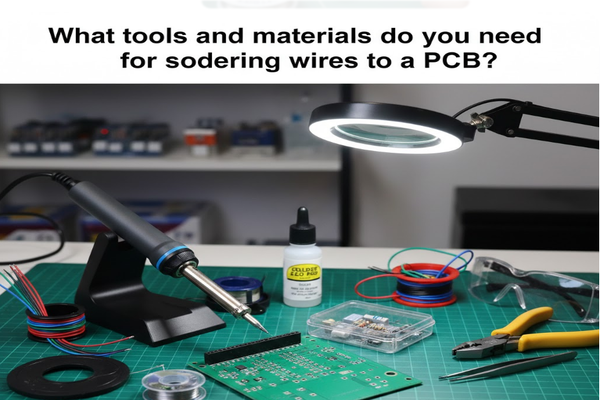
To ensure a seamless soldering experience, here’s a table of suggested tools and their purposes:
| Tool | Purpose |
|---|---|
| Soldering Iron | Heats solder to join connections |
| Solder | Provides the conductive connection |
| Wire Strippers | Prepares wires by stripping insulation |
| Helping Hand Tool | Secures PCB while soldering |
Using these tools correctly will set the foundation for strong electrical connections. Each tool serves a specific purpose, so understanding their roles is essential for better performance and efficiency.
What are the steps for the soldering process?
Proper steps help achieve clean and lasting connections. I remember my first-time soldering, and following a method made all the difference.
Start by preparing your workspace and gathering your tools. Clean the area on the PCB where you’ll solder. Next, insert the wire into the PCB hole (if using through-hole method) or place it on the copper pad (for surface mount). Heat the joint area with the soldering iron, then apply solder until it flows around the wire.
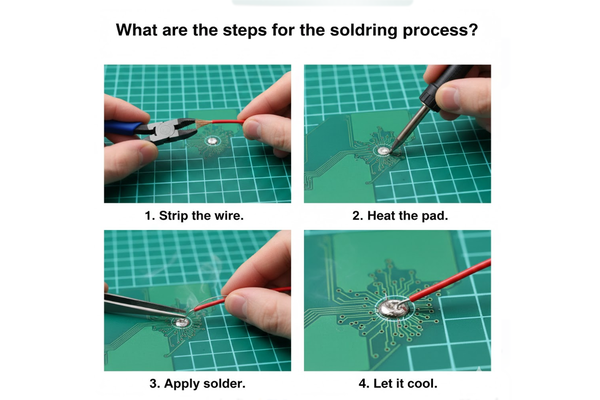
For a successful solder joint, follow these detailed steps:
- Clean the PCB area.
- Insert the wire or place it on the pad.
- Heat the joint with the soldering iron.
- Apply solder until it covers the area.
- Remove the soldering iron and let it cool.
Each step builds a strong connection. Careful execution can save you time in the long run and avoid repeated attempts due to mistakes.
What common mistakes should you avoid during soldering?
Learning from errors can transform your soldering game. Many beginners make small mistakes that lead to bigger problems over time.
Common mistakes include insufficient heating of the joint, applying too much solder, or forgetting to clean the surface beforehand. These errors can cause weak connections or even circuit damage.
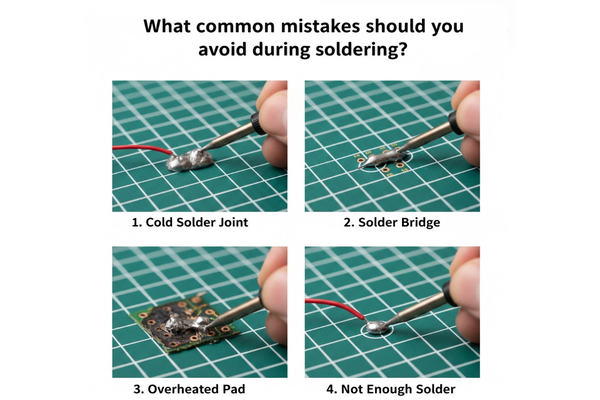
Avoid these common errors:
| Mistake | Consequence |
|---|---|
| Insufficient heating | Weak joint, potential failure |
| Excessive solder | Short circuits |
| Dirty surface | Poor connectivity |
Understanding these mistakes helps you improve your skills. Each soldering session is a learning opportunity, paving the way for future successes.
Conclusion
Soldering wires to a circuit board is a skill worth mastering. With the right tools and techniques, anyone can do it.
[^1]: This resource explains the differences, helping you choose the right technique for your projects. [^2]: Explore this link to learn about surface mount technology and its advantages in modern electronics. [^3]: Learn about the best wire strippers to enhance your soldering experience and ensure clean connections. [^4]: Explore this link to find top-rated soldering irons that ensure precision and ease for beginners.

