

Ever ruined a circuit board by accidentally melting components while soldering wires? It's frustrating and costly. Simple preparation and technique prevent these disasters every time.
Yes, you can safely solder wires to PCBs by preparing materials, applying heat correctly, and creating secure joints with these proven techniques.
Solder confidently by mastering each step and recognizing common pitfalls. Get ready to build reliable connections.
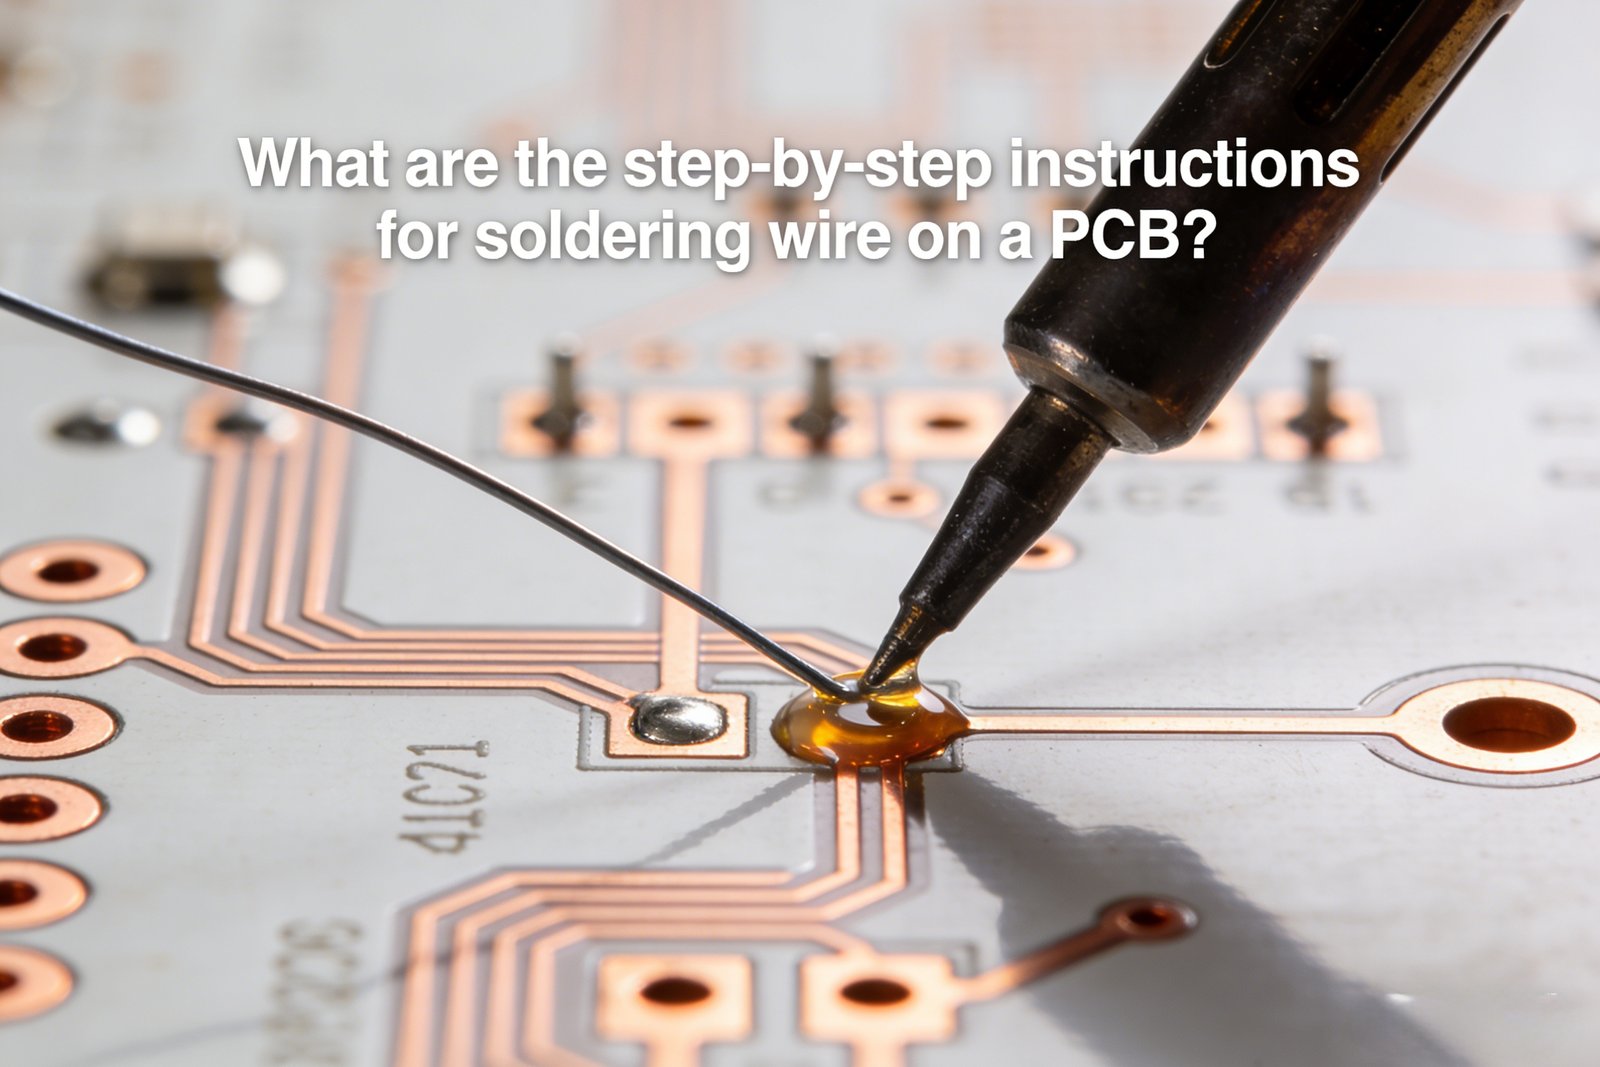
What are the step-by-step instructions for soldering wire on a PCB?
Seeing smoke while soldering is scary - proper methods eliminate this danger. Protect yourself with essential prep work.
Follow these 10 key steps: Prepare tools → Clean PCB → Strip wires → Tin parts → Apply flux → Position components → Heat joints → Feed solder → Cool → Inspect.
Soldering Stages Explained
Safety dominates initial preparation. Ventilation prevents harmful fume inhalation while ESD protection shields sensitive components. Never skip safety glasses - I've seen molten solder splash onto skin.
Material preparation directly impacts joint quality. Contaminated surfaces cause weak bonds. I scrub every pad with alcohol using these tools:
| Tool | Purpose | Impact |
|---|---|---|
| Brass sponge | Cleans iron tip | Prevents oxidation buildup |
| Flux pen | Removes oxides | Improves solder flow |
| Wire strippers | Exposes conductors | Ensures proper wire contact |
Soldering execution requires heat management. Rest the iron tip simultaneously against the wire and pad before feeding solder. Withdraw instantly when solder flows freely - overheating weakens connections.
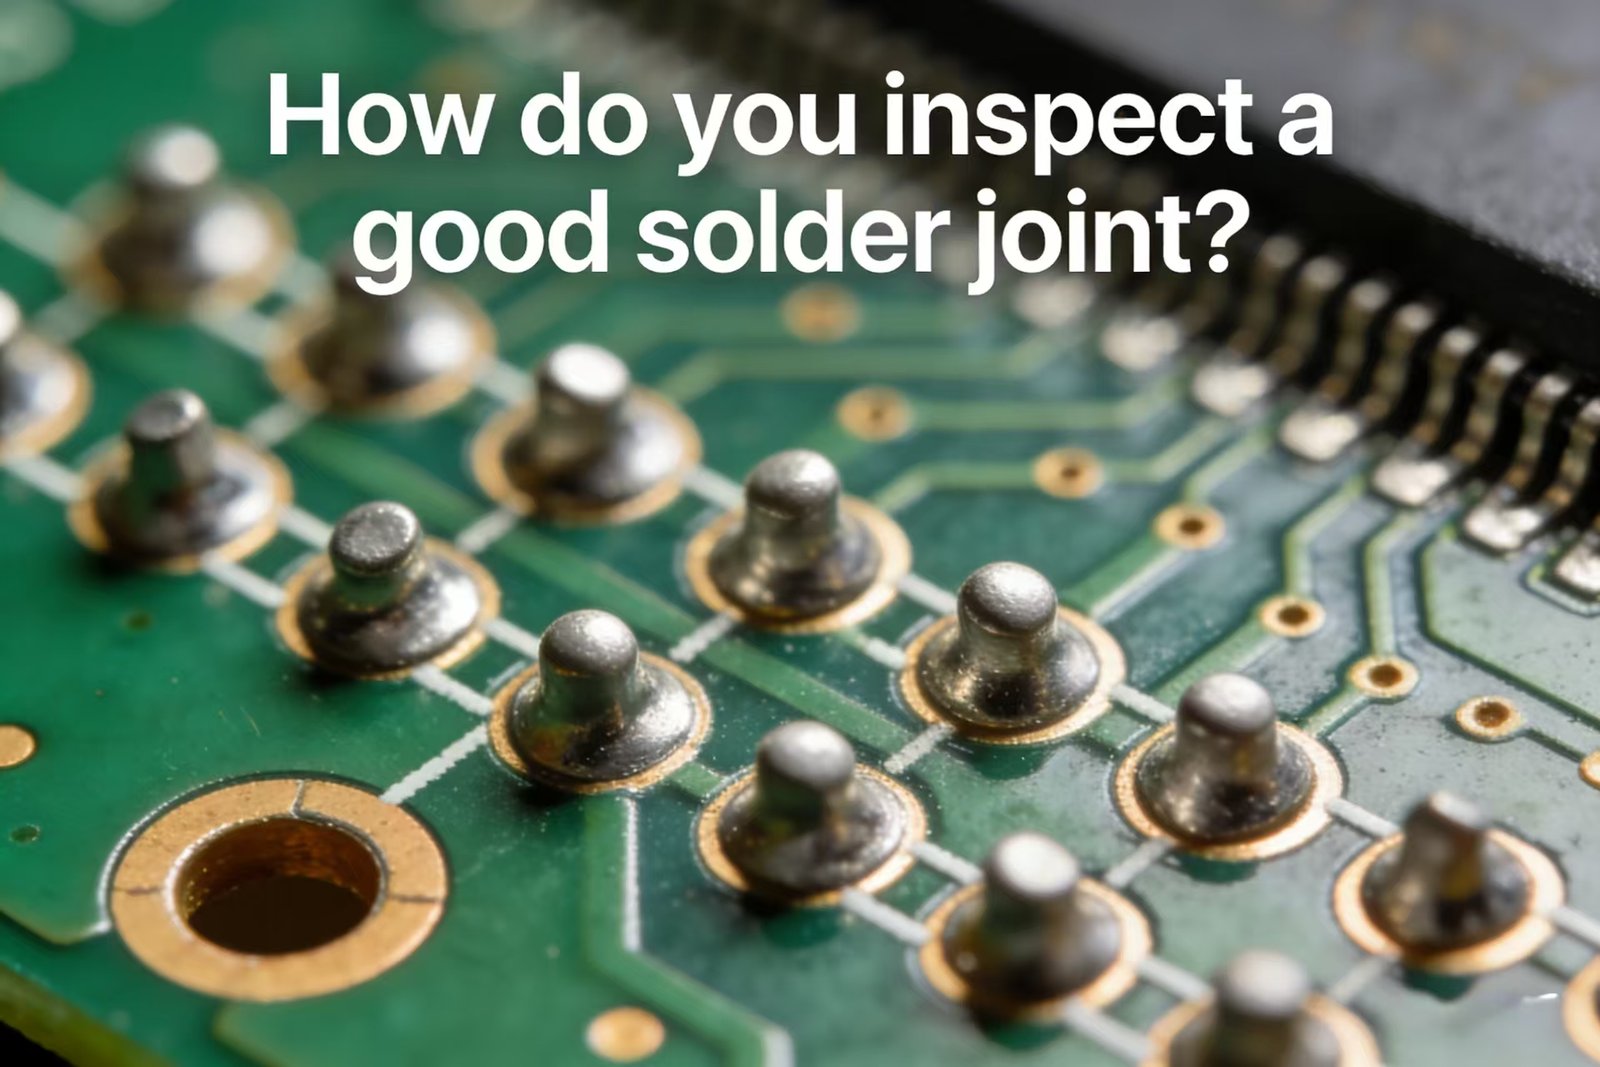
How do you inspect a good solder joint?
Poor joints unexpectedly fail during operation. Recognizing defects early prevents equipment malfunctions and safety risks.
Quality joints are shiny, smooth and volcano-shaped - not dull, lumpy, or cracked. They pass visual checks and physical tests without breaking.
Inspection Methodology
Assessment occurs visually first. Optimal joints reflect light evenly with concave fillets that hug components. Compare against examples:
| Characteristic | Good Joint | Faulty Joint |
|---|---|---|
| Surface | Smooth, shiny | Dull/grainy |
| Shape | Concave meniscus | Ball-shaped |
| Coverage | Full wire wrap | Gaps/voids |
| Color | Bright silver | Dark/splotchy |
Physical testing comes next. Gentle tugging verifies strength - weak joints separate easily. Conductive checks examine electrical flow using multimeters. Remember: A joint looking good might still conduct poorly if crystallized inside.
Advanced diagnostics involve cross-sectioning failed joints under magnification. This reveals hidden voids from insufficient heat introduced too quickly. Documentation helps track recurring issues across projects.
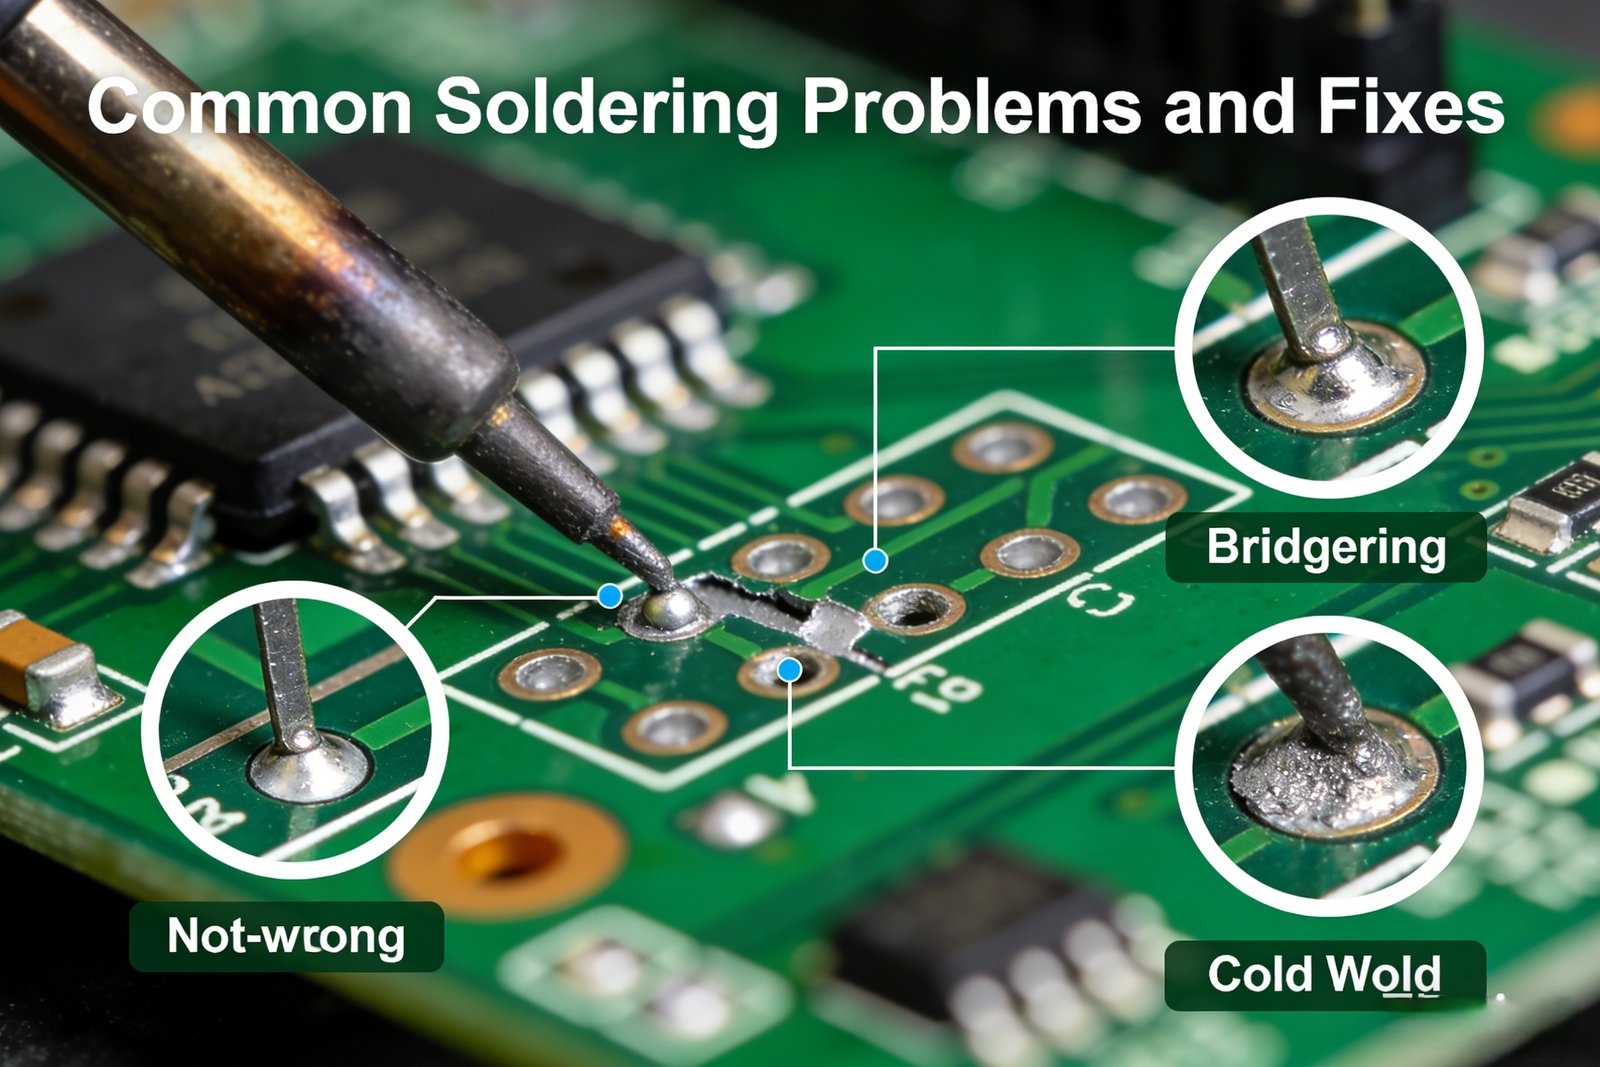
What are common soldering problems and their fixes?
Bridging contacts or cold joints plague beginners. Experienced makers overcome errors using targeted solutions without scrapping projects.
Fix cold joints with reheating and flux adjustments. Remove bridges using solder wicks and proper iron technique.
Failure Correction Guide
Common errors stem from specific technique flaws. Cold joints happen when both surfaces don't reach adequate temperature simultaneously, creating weak brittle connections.
Bridging occurs from excessive solder or insufficient angle between components. My quick solutions:
| Problem | Cause | Solution |
|---|---|---|
| Cold joint | Insufficient heat | Reheat + flux |
| Solder bridge | Overflow/contamination | Solder wick |
| Lifted pad | Overheated PCB | Jumper repair |
| Skips | Dirty surface | Alcohol wipe |
| Charring | Wrong temperature | Adjust iron setting |
Equipment choices affect outcomes directly. Thin tips provide precision while chisel tips transfer heat faster for thick wires. Recalibrate thermostats seasonally - workshop temperature changes alter performance significantly.
Master each method through repetition before complex assemblies. Start monitoring your heating time and withdrawal speed when symptoms emerge.
Achieve strong PCB-wire connections using proper preparation, controlled techniques, and vigilant inspection - your electronics will operate reliably.

