

Is your keyboard acting up? Don't panic! I've been there, staring at a dead keyboard. Let's fix it together.
Troubleshooting a keyboard involves checking for common issues like damaged wiring[^1], loose solder[^2], or faulty components[^3]. Start with a visual inspection[^4], then test circuit continuity[^5], power supply[^6], and finally, component and firmware repair[^7].
Sometimes, your trusty keyboard just stops working. It can be frustrating, especially when you're in the middle of something important. But before you toss it out, know that many keyboard problems have simple solutions. We'll walk through the steps, so you can get back to typing smoothly.
Why is the Corne keyboard so popular?
Ever seen a Corne keyboard and wondered about the hype? I certainly did. Its unique design draws a lot of attention.
The Corne keyboard is popular for its ergonomic split design[^8], compact size[^9], and customization options[^10]. It helps reduce wrist strain and offers a highly personalized typing experience, making it a favorite among enthusiasts.
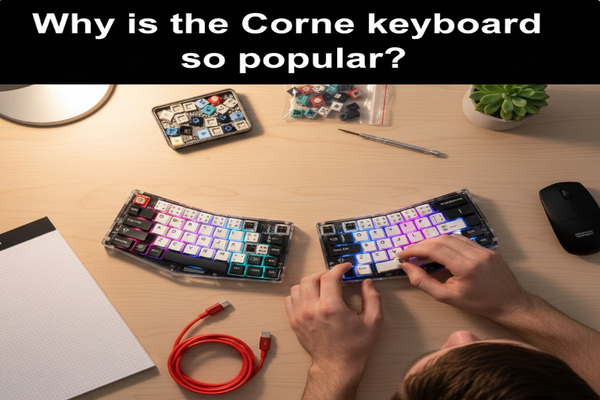
The Corne keyboard's popularity stems from several key features that cater to specific user needs. Its split design allows for a more natural hand and wrist position, reducing the risk of repetitive strain injuries. This ergonomic advantage is a big draw for long-term typists.
Ergonomic Design
The two halves of the Corne keyboard can be positioned independently, aligning with the user's shoulder width. This separation minimizes ulnar deviation, a common cause of wrist pain.
Compact Form Factor
Corne keyboards are typically 40% layouts, meaning they have fewer keys. This compact size makes them portable and forces users to utilize layers for less frequently used keys, which can increase typing efficiency once mastered.
Customization
Users can choose their own switches, keycaps, and even build the keyboard from a kit. This level of personalization allows for a typing experience tailored precisely to individual preferences.
| Feature | Benefit |
|---|---|
| Split Design | Reduces wrist strain, natural hand position |
| Compact Size | Portability, efficient key usage |
| Customization | Personalized typing experience |
| Open Source | Community support, innovation |
Can you swap keyboard PCB?
Thinking about upgrading your keyboard's brain? I once wondered if I could just pop in a new PCB.
Yes, you can swap a keyboard PCB, but it requires compatibility with your case and plate, and often involves desoldering switches[^11]. This process allows for upgrades, repairs, or changing features like hot-swap capabilities[^12] or RGB lighting[^13].
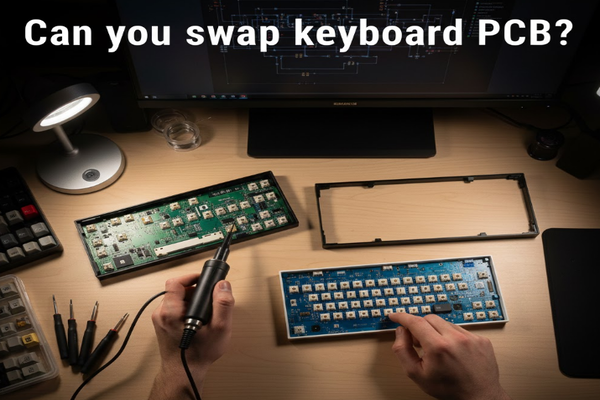
Swapping a keyboard PCB is definitely possible, but it's not always a straightforward plug-and-play operation. When I decided to swap a PCB for a build, I learned a lot about compatibility and the steps involved. The main hurdles are ensuring the new PCB fits your existing keyboard case and plate.
Compatibility Checks
Before buying a new PCB, measure your case and check its mounting points. Not all PCBs are universal. Some cases use specific screw positions or form factors that only work with certain PCBs. Also, consider the plate – the new PCB needs to align with the plate's switch cutouts.
Desoldering and Soldering
If your current keyboard uses soldered switches, you'll need a desoldering iron to remove them from the old PCB. Then, you'll solder them onto the new PCB. This step requires patience and a steady hand. Hot-swappable PCBs simplify this as they have sockets for switches, eliminating the need for soldering.
Firmware and Software
A new PCB might come with different firmware or require specific software for key remapping[^14] and lighting control. Be prepared to flash new firmware or use proprietary configurator tools like QMK or VIA to get everything working as you like.
| Step | Description |
|---|---|
| Check Compatibility | Case size, mounting points, plate alignment |
| Desolder Switches | Remove switches from old PCB (if soldered) |
| Install New PCB | Secure new PCB in case and attach switches |
| Solder Switches | Solder switches to new PCB (if not hot-swap) |
| Configure Firmware | Flash new firmware, remap keys, adjust RGB |
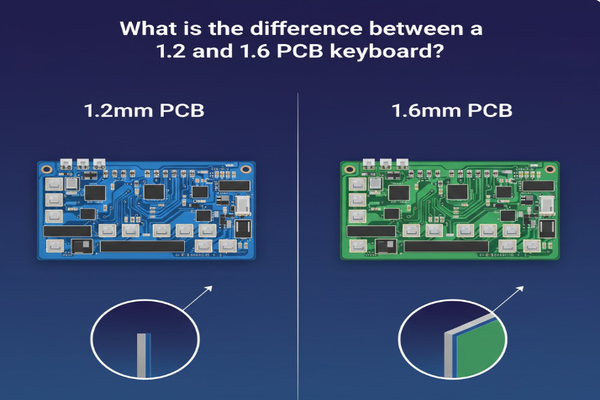
What is the difference between a 1.2 and 1.6 PCB keyboard?
Ever seen "1.2mm" or "1.6mm" when looking at PCBs? I was confused at first, wondering if it really mattered.
The difference between 1.2mm and 1.6mm PCB keyboards lies in the thickness of the circuit board. 1.2mm PCBs are thinner, often preferred for their softer typing feel[^15] and better compatibility with certain switch types, while 1.6mm is the standard, offering more rigidity.
The thickness of a keyboard's PCB, specifically 1.2mm versus 1.6mm, might seem like a minor detail, but it can significantly impact the typing experience and build compatibility. When I first encountered these specifications, I didn't think much of it until I felt the difference in a custom build.
Typing Feel and Flex
A 1.2mm PCB is noticeably thinner than the standard 1.6mm. This reduced thickness often leads to more "flex" in the PCB when typing. This flex can result in a slightly softer, bouncier typing feel, which some users find more comfortable and acoustically pleasing. On the other hand, a 1.6mm PCB offers a firmer, more rigid typing experience.
Compatibility with Switches
The thinner 1.2mm PCBs are often designed with specific switch types in mind, particularly those with longer poles or different housing designs that might bottom out prematurely on a thicker PCB. Some newer switches are optimized for 1.2mm PCBs to achieve a particular sound profile or key travel. Standard 1.6mm PCBs generally work with the widest range of switches without issue.
Durability and Manufacturing
While 1.6mm PCBs are generally considered more robust due to their thickness, modern 1.2mm PCBs are still very durable. The manufacturing processes for both are highly advanced. The choice often comes down to aesthetic preferences, desired typing feel, and specific component compatibility, rather than a significant difference in long-term reliability.
| Feature | 1.2mm PCB | 1.6mm PCB |
|---|---|---|
| Thickness | Thinner | Standard |
| Typing Feel | Softer, more flexible, bouncier | Firmer, more rigid |
| Switch Compat. | Optimized for certain switch types | Broad compatibility with most switches |
| Commonality | Less common, often in custom builds | Most common, standard for many keyboards |
Conclusion
Don't let a faulty keyboard slow you down. By systematically checking for common issues, exploring custom options like Corne, understanding PCB swaps, and even considering PCB thickness, you can tackle most keyboard problems and enhance your typing experience.
[^1]: Understanding damaged wiring can help you identify and fix keyboard issues effectively. [^2]: Identifying loose solder can prevent further damage and ensure your keyboard functions properly. [^3]: Learning about faulty components can help you troubleshoot and repair your keyboard more efficiently. [^4]: A proper visual inspection can reveal many issues before diving into more complex repairs. [^5]: Understanding circuit continuity is crucial for diagnosing electrical issues in keyboards. [^6]: Knowing how power supply issues can affect your keyboard can help you troubleshoot effectively. [^7]: Firmware repair can resolve many keyboard issues, making it essential to understand the process. [^8]: Exploring ergonomic designs can enhance your typing comfort and reduce strain. [^9]: Understanding the advantages of compact keyboards can help you choose the right one for your needs. [^10]: Customization can significantly enhance your typing experience, making it worth exploring. [^11]: Learning to desolder switches is essential for anyone looking to upgrade or repair their keyboard. [^12]: Hot-swap capabilities can simplify upgrades and repairs, making them a valuable feature. [^13]: RGB lighting not only adds aesthetics but can also improve usability in low-light conditions. [^14]: Key remapping can enhance your productivity and typing efficiency, making it a useful skill. [^15]: Understanding how PCB thickness impacts typing feel can help you choose the right keyboard.

